 how-to guide
How to Prevent Floor Squeaks: 7 Proven Methods
Table of Contents
- What Causes Floor Squeaks and How to Prevent Them
- Diagnosing the Source: Identifying Where Squeaks Come From
- How to Fix Squeaky Subfloor: From Below and Above
- Using Lubricants and Gap Fillers to Silence Floor Squeaks
- Filling Gaps with Shims and Fasteners
- Wood Floor Expansion and Contraction: Prevention Strategies
- Squeaky Floor Repair Cost and Subfloor Adhesive Solutions
- Flooring-Type-Specific Prevention: LVP, Hardwood, and Engineered
Last Updated: July 24, 2026
What Causes Floor Squeaks and How to Prevent Them
Floor squeaks result from friction between subfloor and joists, fastener movement, or gaps that allow wood to shift seasonally. Wood naturally expands and contracts as humidity and temperature change. When subfloor panels shift against joists or nails loosen over time, friction creates that distinctive squeaking sound.
Understanding friction and floor movement
Friction between the subfloor and floor joists is the primary culprit. The subfloor, typically made of plywood or OSB, sits on top of wooden joists spaced 16 inches apart. Over years of foot traffic and seasonal moisture changes, fasteners can loosen, allowing the subfloor to shift. Wood is hygroscopic, meaning it absorbs and releases moisture based on the surrounding environment. When humidity increases, wood swells; when it decreases, wood shrinks. This constant dimensional change causes the subfloor and joists to move relative to each other.
The type of fasteners matters significantly. Nails, standard in older homes, are prone to loosening because they rely on friction to stay in place. Wood screws have threads that grip wood fibers and resist backing out, making them superior for preventing squeaks.
Why seasonal expansion and contraction matter
During winter, when heating systems run and indoor humidity drops, wood loses moisture and shrinks. During summer, when humidity rises, wood absorbs moisture and expands. These changes allow gaps to develop between the subfloor and joists, increasing friction and squeaking.
The seasonal nature of floor squeaks explains why repairs might seem to work temporarily but then the squeak returns. If you simply tighten fasteners during a dry season, the subfloor may shift again when humidity increases. The most effective repairs address both immediate looseness and underlying moisture dynamics.
Diagnosing the Source: Identifying Where Squeaks Come From
Pinpointing exactly where a squeak originates is the critical first step. Have someone walk across the floor while you listen from the basement or crawl space. This direct access allows you to observe which components are moving and where fasteners are loose.
Locating squeaks in different flooring types
Different flooring materials affect how squeaks sound and where they appear. With hardwood floors, squeaks often originate from the subfloor beneath, but the hardwood itself can also be a source if joints aren't tight. Engineered wood is more stable than solid hardwood because its plywood base resists warping. Luxury vinyl plank (LVP) is a floating floor system, so squeaks often come from the underlayment moving or planks rubbing against each other. Carpet hides squeaks effectively because padding and fibers dampen sound, but squeaks can still occur beneath if the subfloor is moving significantly.
| Flooring Type | Squeak Origin | Detection Method | Difficulty to Fix |
|---|---|---|---|
| Hardwood | Subfloor or hardwood planks | Listen from below or remove boards | Medium |
| Engineered Wood | Subfloor primarily | Listen from below | Medium |
| LVP | Underlayment or planks | Check underlayment quality | Low to Medium |
| Carpet | Subfloor below | Remove carpet section temporarily | Medium |
How to Fix Squeaky Subfloor: From Below and Above
Once you've identified where the squeak originates, you have two primary approaches: fix it from below the subfloor or from above. The method depends on whether you have access to a basement or crawl space and whether you're willing to remove flooring.
Installing screws from below the subfloor
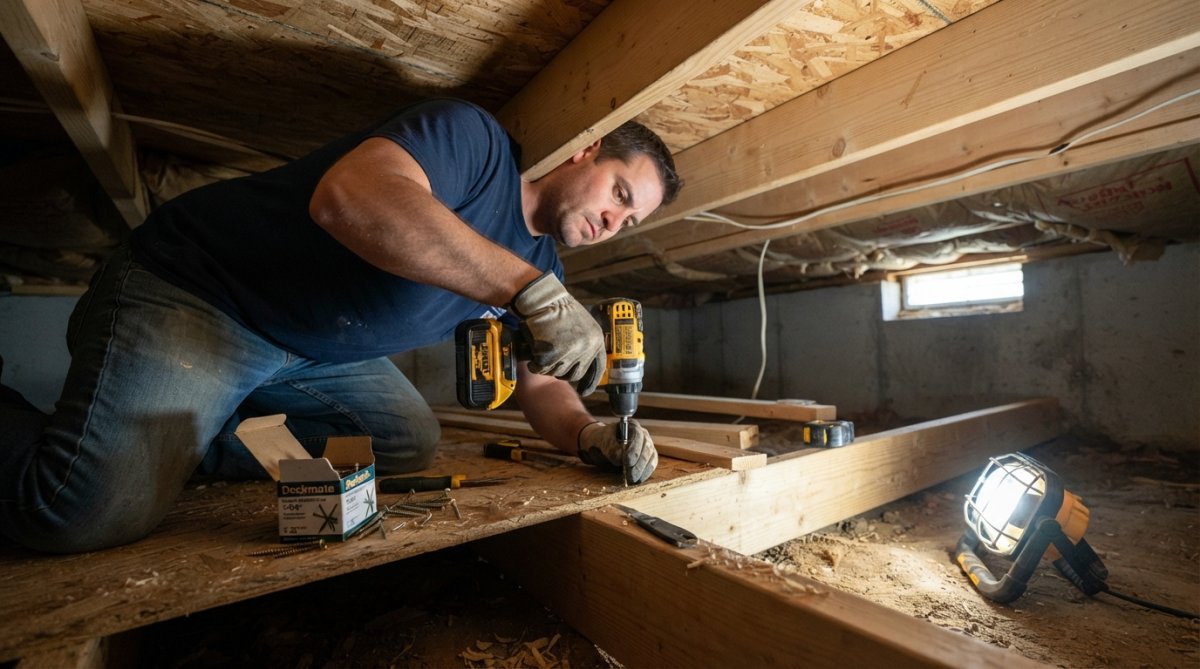
If you have access from below, installing wood screws is one of the most effective solutions. Mark the approximate location of the squeak from above. Once underneath, identify the joists and the area where the subfloor appears to be moving. Install 2.5-inch wood screws that pass through the subfloor and into the joists, pulling the subfloor tight against the joist.
Drill a pilot hole first to prevent wood splitting and ensure the screw goes in straight. Position screws every 12 inches along the joist where the squeak occurs.
This method is less disruptive than removing flooring and requires only basic tools and a few hours of work.
Installing screws from above the floor
If you don't have basement or crawl space access, install screws from above. This requires removing the finished flooring in the squeaky area. For hardwood or engineered wood floors, carefully remove boards to access the subfloor and joists. Install 2.5-inch wood screws through the subfloor into the joists using the same spacing and technique as the below-floor method. After installing screws, refinish the subfloor area and reinstall the flooring.
For LVP, remove the planks and inspect the underlayment and subfloor. If the subfloor is uneven, add shims or use self-leveling compound. If the underlayment is compressed or damaged, replace it.
Using Lubricants and Gap Fillers to Silence Floor Squeaks
Beyond tightening fasteners, lubricants and gap fillers can reduce squeaks by reducing friction and preventing movement.
Applying powdered graphite and talcum powder
Powdered graphite is a dry lubricant that reduces friction without adding moisture. Locate the squeaky area from below and use a powder applicator to puff graphite into gaps between the subfloor and joists. The graphite settles into small spaces and creates a slippery surface that reduces friction, typically producing immediate results.
Powdered lubricants are inexpensive and non-invasive but temporary. The powder can migrate over time, and squeaks may return after months or years. Use this method as a quick fix while planning a more permanent solution.
Using construction adhesive and wood filler
Construction adhesive (subfloor adhesive) applied between the subfloor and joists reduces movement and prevents squeaks. Apply adhesive in a bead along the top of the joist where it contacts the subfloor using a caulking gun. The adhesive bonds the subfloor to the joist, preventing movements that cause squeaking. Allow the adhesive to cure fully (typically 24 hours) before applying loads.
For gaps between subfloor panels or between the subfloor and joist, use flexible wood filler that can accommodate seasonal wood movement.
Filling Gaps with Shims and Fasteners
Gaps between the subfloor and joists are a primary cause of squeaks. Wooden shims, thin wedges, can fill these gaps and prevent movement.
Strategic shim placement between joists and subfloor
Drive wooden shims into the space between the subfloor and joist until snug; don't force them. Shims work best in combination with fasteners. After shimming a gap, install wood screws to hold the subfloor tight against the shim and joist. Focus on areas where you observed movement or where the squeak originated. Shims are inexpensive and reversible but require crawl space access.
Wood Floor Expansion and Contraction: Prevention Strategies
Preventing squeaks long-term requires managing the environmental conditions that cause wood movement.
Managing relative humidity in your home
Maintaining stable relative humidity is one of the most effective ways to prevent floor squeaks. Keep humidity between 30% and 50% to minimize wood movement and reduce fastener loosening. In winter, use a humidifier to raise humidity levels. In summer, use a dehumidifier to lower it.
Proper ventilation in basements and crawl spaces is important. Poor ventilation leads to high humidity, causing wood to swell and promoting mold growth. Install vents or a dehumidifier in crawl spaces to maintain humidity below 60%.
Moisture-resistant flooring options
Consider moisture-resistant options when installing new flooring. Engineered wood is more stable than solid hardwood because the plywood base resists warping. Luxury vinyl plank is extremely stable because it doesn't absorb moisture like wood. For subfloors, moisture-resistant plywood or OSB with a moisture barrier reduces wood movement. Installing a vapor barrier on crawl space ground can significantly reduce humidity levels and prevent wood movement.
Squeaky Floor Repair Cost and Subfloor Adhesive Solutions
Understanding costs and options helps you choose the best repair approach.
DIY versus professional repair investments
DIY repair from below the subfloor is most cost-effective. You'll need wood screws, a drill, a pilot bit, and possibly graphite powder or construction adhesive. Total material cost is typically under $50. DIY repair from above is more expensive because you'll need to remove and reinstall flooring, with material costs under $100 but significant time investment.
Professional subfloor repair from below typically costs $300 to $800 per squeaky area. Professional repair from above, including flooring removal and reinstallation, can cost $1,000 to $3,000 or more. The decision between DIY and professional repair depends on your comfort level, subfloor access, and budget.
Choosing the right subfloor adhesive
Subfloor adhesive is construction adhesive specifically formulated to bond subfloor to joists. Look for products that are moisture-resistant and flexible enough to accommodate seasonal wood movement. Apply adhesive in a continuous bead, not dots or dashes. Allow the adhesive to cure fully before applying loads; most products require 24 hours.
Subfloor adhesive is most effective when combined with mechanical fasteners like screws.
Flooring-Type-Specific Prevention: LVP, Hardwood, and Engineered
Different flooring materials require slightly different prevention strategies.
Luxury vinyl plank (LVP) squeaks
LVP is a floating floor system, so squeaks typically come from underlayment compressing, planks moving against each other, or uneven subfloors. Ensure the subfloor is level and stable before installation. Use quality underlayment designed for LVP; cheaper underlayments compress over time. If you already have squeaking LVP, remove the planks and inspect the underlayment. If compressed or damaged, replace it. If the subfloor is uneven, use self-leveling compound or shims.
Hardwood and engineered wood considerations
Squeaks typically originate from subfloor movement rather than the flooring itself. Ensure the subfloor is stable and properly fastened to joists. Engineered wood is more stable than solid hardwood and less prone to squeaks. For existing hardwood floors, maintain stable humidity and ensure subfloor fasteners are tight. If squeaks develop, access the subfloor from below and install additional screws or apply adhesive.
Squeaky floors are preventable and repairable with the right approach. Solutions range from simple (applying graphite powder) to more involved (installing screws from below). The most effective long-term strategy is maintaining stable humidity and ensuring fasteners are tight.
If you're facing squeaky floors in your Suffolk County home or planning a new installation, Hamptons carpet one floor and Home can help you select the right flooring materials and underlayment to prevent squeaks from the start. Our team understands local climate and humidity patterns that affect wood movement and can recommend moisture-resistant options like engineered wood and quality underlayment designed to minimize movement. Visit our showroom to explore flooring options that will keep your home quiet and your floors stable for years to come.
Frequently Asked Questions
What causes floor squeaks and how can I prevent them?
Floor squeaks typically result from friction between the subfloor and joists, or between flooring and subfloor layers. Seasonal expansion and contraction of wood exacerbates this movement. Prevention strategies include reducing friction with lubricants like powdered graphite, securing the subfloor with wood screws and construction adhesive, filling gaps with shims, and controlling indoor humidity levels to minimize wood movement. The specific approach depends on your flooring type and whether the squeak originates from above or below.
How do I fix a squeaky subfloor using construction adhesive and fasteners?
To fix a squeaky subfloor, first locate the source of the squeak by walking across the floor. From below, apply construction adhesive along the joist and press the subfloor firmly into place. Install wood screws through the subfloor into the joists using pilot holes to prevent splitting, space fasteners 8-12 inches apart. From above, drive finish nails or wood screws at an angle through the flooring into the joists. This dual approach eliminates friction and floor movement that causes noise.
What's the best way to prevent floor squeaks in different flooring types like LVP and hardwood?
Prevention strategies vary by flooring type. For luxury vinyl plank (LVP), ensure the subfloor is flat and secure, as LVP is more prone to squeaks over uneven surfaces. Hardwood and engineered wood require careful moisture control, maintain relative humidity between 30-50% to minimize expansion and contraction. All flooring types benefit from proper subfloor preparation, including gap filling with shims, securing joists with adequate fastener spacing, and applying subfloor adhesive during installation. LVP may also benefit from acoustic underlayment.
Are there rental-friendly solutions to prevent floor squeaks without damaging the floor?
Yes. Rental-friendly options include using powdered graphite or talcum powder sprinkled into gaps, these reduce friction without permanent damage. Adhesive-backed shims can fill gaps between joists and subfloor without fasteners. Acoustic floor mats placed over squeaky areas provide temporary noise reduction. For more permanent solutions permitted by landlords, construction adhesive and finish nails cause minimal damage compared to structural repairs. Always consult your lease and landlord before making modifications.
This article was written using GrandRanker