 How-to
DIY Floor Scratch Repair for Sand Damage: Fix Scratches
Table of Contents
- Why Sand Causes Scratches on Hardwood Flooring
- Step 1: Identify Your Floor Finish Before You Start
- Step 2: Assess the Scratch Depth and Clean the Area
- Step 3: Repair Surface Scratches with a Hardwood Floor Scratch Repair Kit
- Step 4: Fix Deep Gouges with Wood Filler and Color Matching
- Step 5: How to Prevent Sand Scratches on Wood Floors
- When to Call a Professional for Floor Scratch Repair
- Frequently Asked Questions
Last Updated: September 9, 2026
Why Sand Causes Scratches on Hardwood Flooring
Sand damage is the most common cause of surface scratches on hardwood flooring, and it is entirely preventable. When beach sand or grit is tracked inside, the particles act like tiny shards of glass embedded in shoe treads and pet paws. Every footstep grinds those abrasive particles against the wood grain, leaving behind the fine, light-colored scratches that dull your floor's finish.
The mechanics are simple: sand is harder than the polyurethane or sealer protecting your wood. Regular vacuuming or sweeping with brush or felt attachments is recommended to remove abrasive particles like sand and grit that cause surface scratches, according to Cali Bamboo's floor maintenance guidance. In coastal areas, this isn't a seasonal problem. It happens daily, which is why a proactive routine matters more than any single repair.
For homeowners and families dealing with sandy environments, the key insight is that most sand scratches are cosmetic. They damage the finish, not the wood itself. That distinction determines whether your diy floor scratch repair for sand damage takes ten minutes or requires a professional refinishing call.
Step 1: Identify Your Floor Finish Before You Start
Before touching any repair product, you must identify whether your floor has a surface finish or a penetrating finish. This single decision determines which products will work and which will make the damage worse.
A surface finish (polyurethane, wax, or aluminum oxide) sits on top of the wood. Most modern hardwood flooring installed in the last few decades uses this type. A penetrating finish soaks into the wood grain itself and is common on older, oiled floors.
Try this simple test: place a few drops of water on the floor. If the water beads up, you have a surface finish. If it soaks in and darkens the wood, you have a penetrating finish that needs oil-based products. This guide focuses on surface-finished floors, which respond best to the repair methods below.
Step 2: Assess the Scratch Depth and Clean the Area
Before you reach for any repair product, you need to know exactly what you're dealing with. Sand damage creates a spectrum of issues, from micro-abrasions that dull the finish to deep gouges that expose bare wood. The wrong repair method can make things worse, so take two minutes to diagnose the damage properly.
The Fingernail Test
Run your fingernail across the scratch at a 90-degree angle. This is the standard test used by flooring professionals:
- Nail glides smoothly - The scratch is confined to the finish layer. A scratch repair marker or polish will handle it.
- Nail catches slightly - The scratch has penetrated the finish but not deeply into the wood. You'll need a filler or a two-part repair compound.
- Nail catches firmly - The gouge has reached the wood itself. This requires wood filler, careful color matching, and a protective topcoat.
The Water Test for Finish Integrity
Sand damage often compromises the finish even when scratches aren't visible. Place a few drops of water on the damaged area and wait 30 seconds. If the water beads up, the finish is still intact. If it soaks in and darkens the wood, the finish has been breached, and you'll need to reseal the area after repair.
The Light Test for Micro-Abrasions
Sand doesn't always leave visible scratches. Often, it creates a fine haze of micro-abrasions that only show up when light hits the floor at an angle. Hold a flashlight parallel to the floor surface. If you see a dull, cloudy patch that wasn't there before, you're dealing with micro-abrasions. These respond best to a finish restorer or a light buffing with a polishing compound, not a scratch marker.
Cleaning: The Step That Prevents More Damage
Once you've assessed the damage, clean the area thoroughly. This isn't just about aesthetics, it's about preventing the repair process itself from causing new scratches.
- Vacuum first - Use a soft brush attachment to remove loose sand and grit. Don't sweep with a broom; it can push abrasive particles into the grain.
- Damp mop or wipe - Use a microfiber mop or cloth slightly dampened with water or a pH-neutral hardwood cleaner. Avoid soaking the floor.
- Dry immediately - Wipe away any residual moisture with a clean, dry microfiber cloth.
- Inspect again - After cleaning, re-examine the scratches. Some superficial marks may have been caused by grit sitting on top of the finish, and they may disappear entirely once the floor is clean.
For pet owners, check your pet's paws for trapped sand before they walk across the floor. A quick paw wipe at the door prevents more damage than any repair method. The same applies to kids coming in from the beach, have them remove shoes and shake out towels before entering.
Once the area is clean and you've confirmed the scratch depth, you can choose the right repair method with confidence.
Step 3: Repair Surface Scratches with a Hardwood Floor Scratch Repair Kit
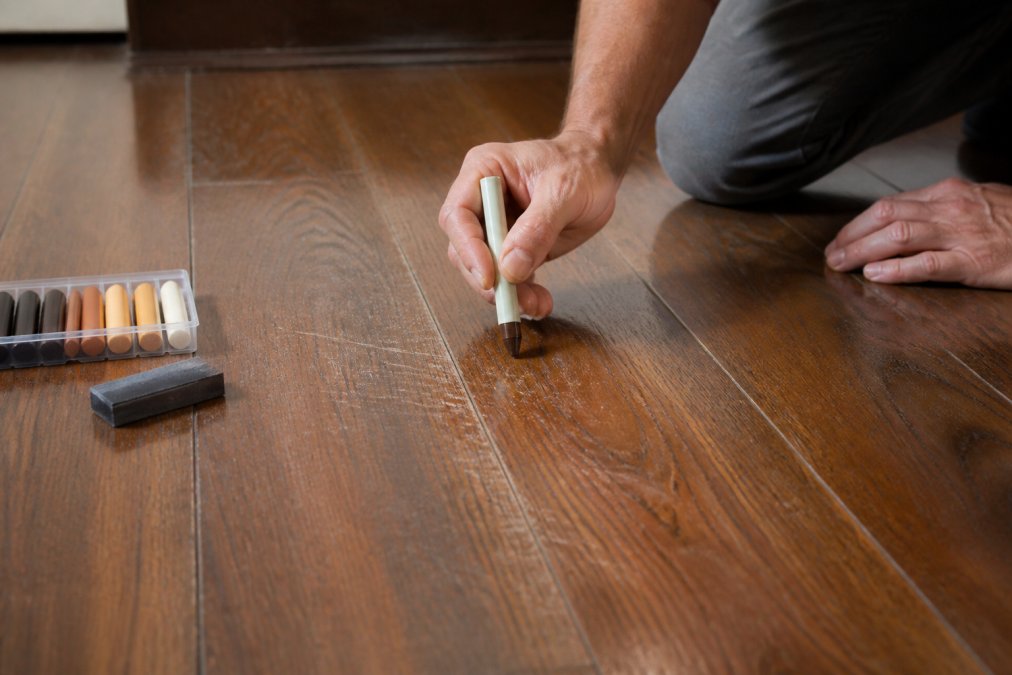
A hardwood floor scratch repair kit is the fastest solution for light, surface-level damage. These kits typically include a stain marker or wax pen matched to common wood tones, allowing you to recolor the scratch without stripping the surrounding finish.
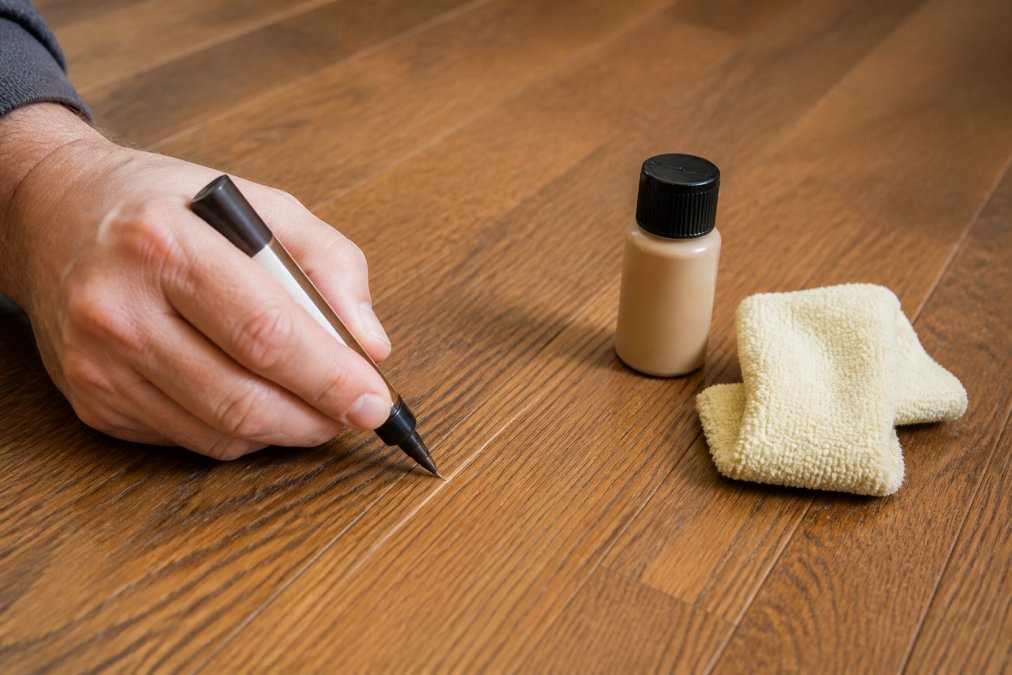
Select the marker shade closest to your floor's color, then test it in an inconspicuous spot first. Apply the marker along the scratch, following the direction of the wood grain. Let it dry for a few minutes, then gently buff the area with a clean microfiber cloth to blend the repair into the surrounding finish.
For scratches that resist the marker, apply a thin coat of finish restorer over the entire affected board. This buff and coat approach rehydrates the polyurethane and softens the appearance of fine scratches across a larger area, making the repair less noticeable.
Step 4: Fix Deep Gouges with Wood Filler and Color Matching
Deep gouges that catch your fingernail need wood filler, not a marker. This is where diy floor scratch repair for sand damage gets more involved, but it remains manageable with patience and the right technique.
Start by cleaning the gouge with a tack cloth to remove all dust. Apply wood putty or filler with a putty knife, pressing it firmly into the scratch and slightly overfilling it. Allow the filler to dry completely, then sand it flush with a fine-grit sanding block (220 grit or higher). Work carefully to avoid sanding the surrounding finish.
For engineered wood floors, proceed with caution. Sanding engineered wood can damage the thin veneer layer, potentially rendering the boards irreparable if the wear layer is breached, as noted by Murphy Oil Soap's guidance on engineered floor care. If your gouge extends through the veneer, spot repair is not possible, and the board may need replacement.
Step 5: How to Prevent Sand Scratches on Wood Floors
Most scratch repair guides treat prevention as an afterthought, a few generic tips about doormats and felt pads. But sand damage is different from everyday wear. It's a mechanical process that follows predictable patterns, and understanding those patterns lets you build a prevention system that actually works.
Why Sand Is Different from Other Dirt
Sand particles are primarily silica, the same material used in sandpaper. A single grain of beach sand is harder than the polyurethane finish on your floor. When you walk across a sandy floor, each footstep acts like a miniature sanding pass. The damage isn't random; it concentrates in the traffic paths where people walk most frequently, and it compounds over time.
The Entry Point Strategy
Sand enters your home through three main routes: shoes, pet paws, and items brought in from outside. Each route needs its own defense.
For shoes: Use a two-zone doormat system. Place a coarse, scraper-style mat outside the door to remove large particles, and a softer, absorbent mat inside to catch what remains. The inside mat should be at least three feet long, long enough for someone to take two full steps. Most people only need two steps to remove the majority of sand from their shoes.
For pets: Sand collects between paw pads and in fur. Keep a microfiber towel or pet wipes near the door. A quick wipe of each paw before your dog enters can remove up to 90% of the sand they'd otherwise track in (calibamboo.com). During beach season, consider a paw rinse station with a shallow basin of water.
For items: Beach bags, coolers, and toys carry sand. Designate a drop zone near the entry where these items can be shaken out or wiped down before they touch the floor.
The Cleaning Cadence That Works
Sweeping once a week isn't enough in a sandy environment. The key is to remove abrasive particles before they get ground into the finish. A practical routine is:
- Daily: Quick sweep or vacuum of high-traffic zones, entryways, kitchen, hallways. This takes two minutes and removes the loose grit that causes most scratches.
- Weekly: Full-floor vacuum with a soft brush attachment, including under furniture and along baseboards where sand accumulates.
- Monthly: Damp mop with a hardwood-safe cleaner to remove the fine dust that vacuuming misses.
Area Rugs as Sacrificial Surfaces
Area rugs aren't just decorative, they're the most effective scratch prevention tool you own. Place runners in high-traffic corridors and entry paths. The rug absorbs the abrasive action of foot traffic, protecting the finish underneath. Choose flat-weave rugs with a non-slip pad; thick pile rugs can trap sand and turn the rug itself into a sandpaper surface.
The Seasonal Reset
At the end of beach season, do a thorough deep clean. Move furniture, vacuum under everything, and inspect the finish for early signs of wear. Catching micro-abrasions in the fall and treating them with a finish restorer prevents them from becoming visible scratches by spring.
What Not to Do
Avoid using a broom with stiff bristles on sandy floors, it can push sand into the grain. Don't use a dust mop with a spray treatment that leaves a residue; the residue can attract more sand. And never use a vacuum with a beater bar, which can create its own scratches on older finishes.
Prevention isn't about achieving a sand-free home, that's impossible in a coastal environment. It's about managing the flow of sand and removing it before it becomes abrasive. With the right entry-point strategy and a consistent cleaning cadence, you can reduce sand scratches by 80% or more, keeping your floor's finish intact for years longer.
When to Call a Professional for Floor Scratch Repair
Some damage exceeds what a diy floor scratch repair for sand damage can fix. If scratches cover more than a small area, if the finish has worn through to bare wood in patches, or if water no longer beads on the surface, the floor likely needs professional attention.
Widespread sand damage often means the entire floor requires refinishing. This process involves sanding down to the bare wood, applying new stain, and sealing with multiple coats of polyurethane. It is a job best left to professionals with drum sanders and commercial-grade equipment.
For homeowners in Suffolk County, NY, dealing with persistent sand damage, Hamptons carpet one floor and Home provides expert guidance on whether a floor can be spot-repaired or needs a full refinish. Our team understands the specific challenges of coastal environments, from salt air to sand tracked in from the beach. We also handle installations for older, historic properties where the original hardwood requires meticulous care, and we can recommend the most durable, moisture-resistant flooring options for beach-front homes.
Sand damage is relentless, but it is manageable. The key is identifying your floor finish, assessing the scratch depth, and applying the right repair method for each situation. Surface scratches respond to a hardwood floor scratch repair kit, while deep gouges require wood filler and careful color matching. When the damage outpaces your diy floor scratch repair efforts, professional refinishing is the reliable path to restoring your floor's appearance.
Get started with Hamptons carpet one floor and Home and protect your hardwood from the sand that wears it down.
Frequently Asked Questions
Can sand damage be repaired without refinishing the entire floor?
Yes, in most cases you can repair sand damage without a full refinish. Surface scratches often respond well to a spot repair using a hardwood floor scratch repair kit or a simple buff and coat with a matching polyurethane finish. Deep gouges may require wood filler and a careful color match, but that still beats sanding the whole floor. The key is to correctly identify your floor's finish and the scratch depth before you start.
What is the best way to remove fine scratches caused by sand on hardwood?
For fine scratches that only affect the finish, start by cleaning the area with a damp microfiber cloth to remove any remaining grit. Then, use a wood floor scratch repair kit with a stain marker or wax crayon that matches your floor color. Apply the marker to the scratch, let it dry, and gently buff the area with a clean cloth. For a more durable fix, apply a thin coat of matching polyurethane over the repaired spot.
Are magic erasers safe to use on hardwood floors for scratch removal?
Avoid magic erasers on hardwood floors. They work as a fine abrasive, which means they can strip the protective finish and make a scratch more visible or dull the surrounding area. Instead of a magic eraser, use a specialized hardwood floor scratch repair kit or a paste of baking soda and water applied with a soft cloth for scuff marks. Always test any cleaning method in an inconspicuous area first.
When should I call a professional for floor scratch repair?
Call a professional when scratches are deep enough to expose the raw wood, when the damage covers a large area, or when your floor has a thin wear layer, like many engineered woods. Sanding deep gouges yourself can breach the veneer and require costly board replacement. A professional can assess whether a full refinish or a targeted spot repair is the right approach for your floor.