 How-to
How to Choose the Right Vinyl Underlayment Thickness
Last Updated: October 28, 2026
Quick Summary
The right underlayment thickness for vinyl depends on the plank and subfloor, not on buying the thickest pad. Start by checking whether the plank already has an attached pad, then follow the plank's installation guide. Dense pads in the 1-3 mm range are a common starting point for floating installs.
- Check the back of the plank for an attached pad before buying any separate underlayment.
- Dense underlayment in the 1-3 mm range is a common starting point for floating installs.
- Test concrete moisture and use a vapor barrier when the test calls for it.
- Confirm the subfloor is flat within the plank manufacturer's stated tolerance first.
- Follow the plank's installation guide, since it overrides general thickness ranges.
Table of Contents
- Check First: Attached Pad or Separate Underlayment
- How Underlayment Thickness Is Measured and What It Does
- Step-by-Step: Matching Thickness to Your Subfloor
- Step-by-Step: Using Plank Thickness and LVP Wear Layer Thickness
- Common Mistakes to Avoid When Choosing Underlayment
- Booking Your Underlayment Check Before Installation
- Frequently Asked Questions
The first question is often: does vinyl plank flooring need underlayment at all? The short answer is that it depends on the product, but for most floating vinyl installs, a thin underlayment does real work.
Vinyl plank flooring is a floating floor in most homes, which means it sits on top of the subfloor rather than being glued or nailed down. Without a pad, every footstep lands directly on the plank and the subfloor below. Underlayment fills small dips, absorbs some noise, and adds a bit of cushion underfoot.
Some planks come with a pad already attached to the back. In that case, a separate underlayment is usually unnecessary, and adding one can actually cause problems. We cover that check in the next section.
- Floating installs: underlayment is usually recommended
- Glue-down installs: the adhesive generally takes the place of a pad
- Attached-pad planks: check the manufacturer's instructions before adding anything
Check First: Attached Pad or Separate Underlayment
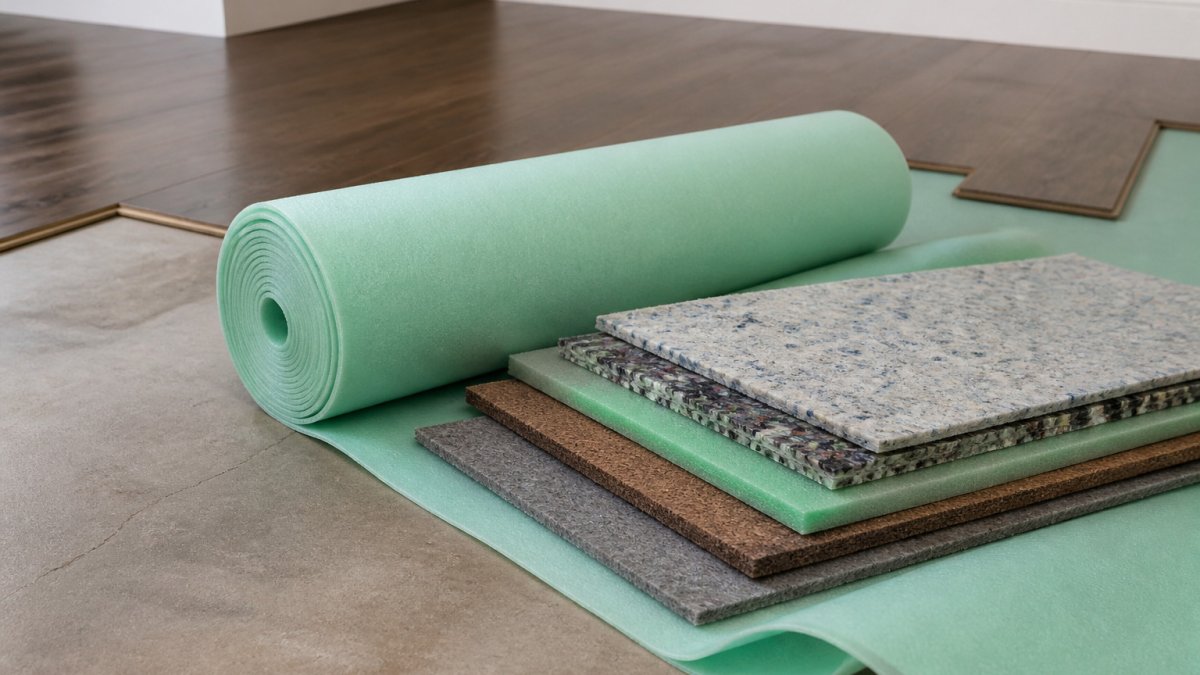
Before you shop for underlayment, look at the back of the plank or the product specification sheet. Many luxury vinyl planks (LVP) ship with a foam or cork layer already bonded to the bottom. If yours has one, that is your underlayment.
Stacking a second pad under an attached-pad plank can be a mistake. The planks can shift, the locking joints can open, and the warranty may not cover the damage. The manufacturer's installation guide is the final word on this.
A quick check:
- Look for a bonded foam or cork layer on the plank back
- Read the warranty and installation section of the product sheet
- If the instructions say "no additional underlayment," follow them
How Underlayment Thickness Is Measured and What It Does
Underlayment thickness is usually listed in millimeters. Plank thickness is listed the same way, but it describes the flooring itself, not the pad underneath. Wear layer thickness, often listed in mils, describes the clear protective top coat on the plank. These three numbers measure different things, and mixing them up is easy.
Thickness affects three things: stability, comfort, and sound. A denser underlayment helps the floor feel solid and keeps the planks from flexing too much. A softer, thicker pad can feel nice underfoot but may make the locking joints less stable over time.
Sources differ on exact ranges. Some installation guides recommend about 1 to 3 mm of dense underlayment for LVP without an attached pad, while others suggest thinner pads for thin planks and warn against anything too soft.
Step-by-Step: Matching Thickness to Your Subfloor
The subfloor decides most of the underlayment choice, but "check the subfloor" is not advice, it is a to-do. The useful version is a decision path that ends in a thickness range and a vapor-barrier yes/no for each common substrate. Work through the steps in order, then use the substrate notes below to land on a specific recommendation.
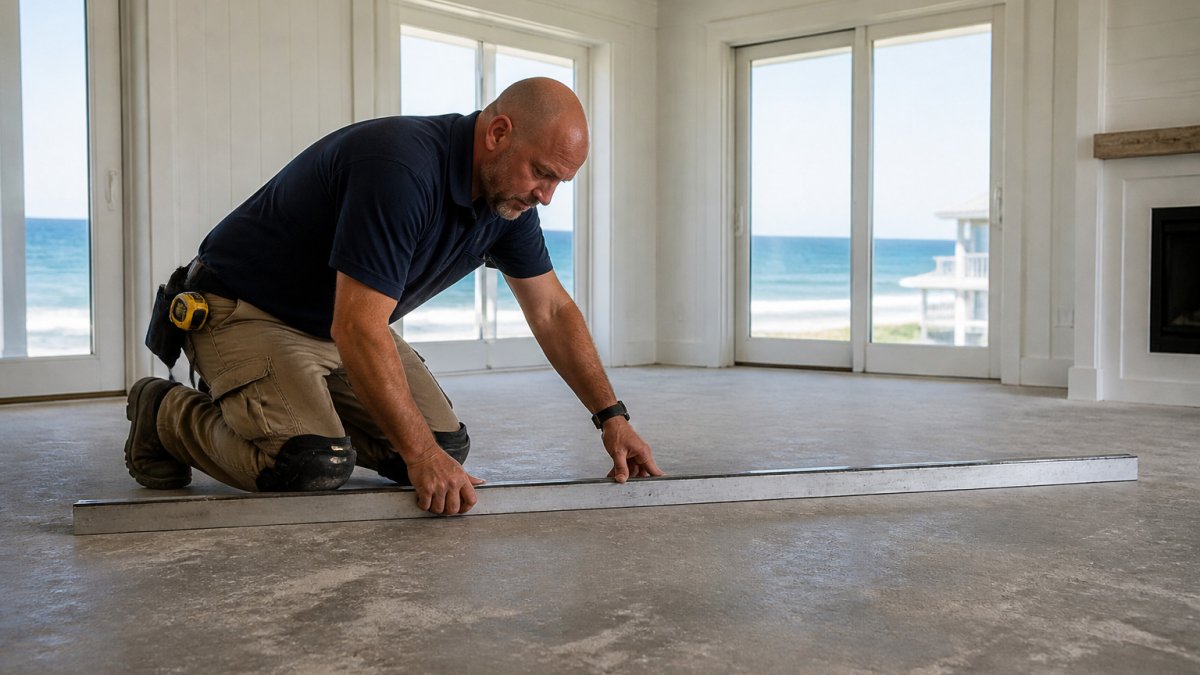
- Check flatness first. Lay a 6-foot straightedge across the floor in several directions. Most vinyl plank manufacturers publish a flatness tolerance, commonly 3/16 inch in 10 feet, though you must confirm the number in your plank's installation guide. Dips or humps beyond that tolerance need leveling compound before any pad goes down. A pad cannot fix an out-of-flat floor; it only hides small imperfections.
- Identify the substrate. Concrete, plywood, OSB, and existing hard-surface flooring each change the pad choice and the moisture strategy.
- Decide whether a vapor barrier is required. This is a substrate question, not a thickness question, and it is the step most homeowners skip.
- Pick the pad density and thickness range for that substrate. Dense foam or cork in the 1-3 mm range is the common starting point for floating LVP without an attached pad, but the plank instructions override any general range.
- Confirm against the plank's installation guide. The guide is the final word on both thickness and vapor-barrier requirements.
- Dry-fit a few rows. Lock three or four rows together on the pad and check that joints close fully and the floor sits flat before you commit to the full install.
Concrete Subfloors
Concrete is the substrate where thickness alone will mislead you. Moisture moves up through a slab, and a foam pad does not stop it. The practical sequence is:
- Test for moisture before choosing a pad. The two common field tests are the calcium chloride test (ASTM F1869) and the relative-humidity test (ASTM F2170). Your plank manufacturer's guide will state which test it accepts and what the passing threshold is.
- Use a vapor barrier when the test calls for it. A vapor barrier is typically a separate polyethylene sheet or a pad with a built-in barrier. Do not assume a thicker foam pad replaces a vapor barrier, it does not.
- Choose a dense pad. Concrete is unforgiving, so a denser foam or cork pad in the 1-3 mm range keeps the locking joints stable better than a soft, thick pad.
Plywood and OSB Subfloors
Wood subfloors are usually the simplest case, but they have their own traps:
- Confirm the subfloor is structurally sound and flat. Squeaks, deflection, and loose panels need to be fixed before pad selection.
- A vapor barrier is usually not required over a conditioned wood subfloor, but crawl-space and basement assemblies can change that. Check the plank guide for the specific assembly.
- Choose a dense, even pad. A pad that compresses unevenly will telegraph panel seams through the vinyl over time.
- Watch fastener heads and panel joints. Any protrusion will show through a soft pad; a dense pad plus a flat subfloor is the fix.
Existing Flooring as a Substrate
Installing over existing hard-surface flooring (tile, sheet vinyl, or another hard floor) is common, but it changes the pad decision:
- Grout lines and texture telegraph. A denser pad reduces telegraphing, but deep grout lines may still require a skim coat or a rigid underlayment panel rather than a foam pad.
- Height matters. Adding a pad over existing flooring raises the finished floor and can affect door clearance and transitions.
- Moisture paths differ. Existing flooring can trap moisture; confirm the assembly is approved in the plank guide before layering.
Quick Substrate Decision Guide
| Substrate | Vapor barrier? | Pad density | Typical thickness starting point |
|---|---|---|---|
| Concrete (slab on grade) | Usually yes, confirm with moisture test | Dense foam or cork | 1-3 mm, per plank guide |
| Plywood / OSB | Usually no in conditioned space | Dense foam | 1-3 mm, per plank guide |
| Existing hard flooring | Depends on assembly | Dense foam; rigid panel if textured | Per plank guide; watch height |
Treat the thickness column as a starting point, not a specification. The plank's installation guide and the substrate moisture test are what actually set the number.
Step-by-Step: Using Plank Thickness and LVP Wear Layer Thickness
Three different numbers get called "thickness" on a vinyl plank carton, and they can be easy to mix up. Before you can choose an underlayment thickness, you need to know which number you are actually reading.
The Three Numbers, Defined
- Underlayment thickness, the pad that goes under the plank. Listed in millimeters (mm). This is the number this article is about.
- Total plank thickness, the full thickness of the vinyl plank itself, including its backing. Also listed in millimeters. Common residential LVP sits around 4-8 mm, with thicker planks often sold for high-traffic rooms.
- Wear layer thickness, the clear protective top coat on the plank, listed in mils (1 mil = 0.001 inch). Residential wear layers commonly run from about 6 mil to 20 mil, with thicker wear layers resisting scratches and traffic better.
A plank labeled "6 mm with a 20 mil wear layer" is telling you two different things: the plank body is 6 mm thick, and the clear top coat is 20 mil. Neither number is the underlayment thickness. The underlayment is a separate product you buy only if the plank does not already have an attached pad.
How the Numbers Interact
Plank thickness and wear layer should guide how you read the underlayment spec, not replace it:
- Note the total plank thickness. Thicker planks are generally more stable over minor subfloor variation, which can let you use a slightly denser, thinner pad rather than a thick soft one.
- Note the wear layer. A thicker wear layer resists scratches and traffic wear, which matters in entryways, kitchens, and rooms with pets. Wear layer does not change underlayment thickness, but it does change how long the floor lasts under the pad.
- Pair the plank with a compatible pad. A very thin plank may need a thinner, denser pad so the locking system stays stable. A thick, soft pad under a thin plank is a recipe for joint separation.
- Check the warranty language. Many manufacturers list pad requirements, maximum thickness, minimum density, or an approved-pad list, and coverage can depend on following them.
Worked Examples
- A 5 mm plank with a 12 mil wear layer, no attached pad, over plywood in a living room. A dense 1-2 mm foam pad is a reasonable starting point; confirm the plank guide's maximum.
- An 8 mm plank with a 20 mil wear layer and an attached pad, over concrete. Do not add a separate pad. Confirm the attached pad's vapor performance and whether the guide requires a separate vapor barrier.
- A 4 mm plank with a 6 mil wear layer, no attached pad, over existing tile. A dense pad helps, but grout telegraphing may require a rigid underlayment panel rather than foam. Check the guide before layering.
The Warranty and Compression Limit
This is the part most guides skip. An overly thick or soft pad lets the plank flex more than the locking joint was designed for. Over time that flex can open joints, crack the locking profile, and, critically, give the manufacturer grounds to deny a claim. Most plank warranties are conditioned on installing over an approved underlayment at or below a stated thickness and within a stated density range. Before you buy, find the approved-pad list or the maximum thickness in the installation guide and match your pad to it exactly. If the guide names specific approved pads, use one of those rather than a generic equivalent.
Common Mistakes to Avoid When Choosing Underlayment
- Stacking pads. Adding underlayment under an attached-pad plank can void the warranty.
- Choosing the thickest pad. Too much cushion can make joints open and planks shift.
- Skipping the subfloor check. A pad cannot fix a floor that is out of level.
- Ignoring moisture. Concrete and crawl spaces need a vapor barrier, especially near the water.
- Buying by price alone. Cheap pads can compress or lose their shape under furniture.
Booking Your Underlayment Check Before Installation
Choosing the right underlayment thickness for vinyl depends on the floor and product. Check the plank's installation guide for its requirements. For current pricing, contact us or visit our website for a quote.
Frequently Asked Questions
Does thicker underlayment always mean better performance for vinyl?
Not necessarily. Underlayment requirements depend on the flooring product. Check the manufacturer's installation instructions for the appropriate thickness and type.
Can using underlayment that is too thick void my vinyl flooring warranty?
Check the product's warranty and installation guide for its underlayment requirements.
Do I need a vapor barrier in addition to my vinyl underlayment?
Check the flooring manufacturer's instructions for vapor-barrier requirements for your subfloor and product.
Is 30 mil LVP worth it?
Thirty mil refers to the wear layer, the clear protective top layer of the plank, not to underlayment. Whether a particular wear-layer thickness is suitable depends on the product and its intended use. Check the manufacturer's product information when deciding.