 How-to
How to Prevent Sand Damage to Floors: A Complete Guide
Table of Contents
- Why Sand Is One of the Most Destructive Forces on Your Floors
- Best Floor Mats for Sand: Stop Grit Before It Gets Inside
- Best Vacuum for Sand on Hardwood Floors: Specs That Actually Matter
- How to Clean Sand Off Hardwood Floors Without Scratching Them
- Preventing Floor Scratches in Beach Homes: A Room-by-Room Strategy
- How to Prevent Sand Damage to Floors with Protective Coatings and Finishes
- Protecting Floors from Salt, Ice Melt, and Winter Slush Damage
- How to Prevent Sand Damage to Floors: Building a Year-Round Maintenance Routine
- Conclusion
Last Updated: May 25, 2026
Sand is one of the most deceptively destructive forces your floors will ever face, and most homeowners don't realize the damage is happening until it's too late. Knowing how to prevent sand damage to floors is the single most valuable thing you can do to protect your flooring investment, whether you live two blocks from the beach or two miles from it. At Hamptons carpet one floor and Home, we've seen firsthand what years of unmanaged grit can do to even the most durable hardwood and stone surfaces across Suffolk County. Below, we'll show you exactly how to stop sand before it scratches, grinds, and strips your finish down to bare wood.
Here's what most guides get wrong: they treat sand prevention as a cleaning problem. It isn't. It's an entry management problem, a materials science problem, and a maintenance timing problem all at once. The five strategies we cover address all three angles.
Why Sand Is One of the Most Destructive Forces on Your Floors
Sand damage to floors is the cumulative result of thousands of microscopic abrasive particles grinding against your floor's protective finish with every step. Unlike a single scratch from a piece of furniture, sand creates a pattern of micro-abrasions that dull and weaken the surface layer over time, eventually exposing the raw material beneath.
The Sandpaper Effect: How Silica and Quartz Grind Down Your Finish
The sandpaper effect is the process by which silica and quartz particles, the primary components of beach sand, act as a distributed abrasive against your floor's finish every time someone walks across it. These minerals have a hardness rating that exceeds most floor finishes, meaning each grain functions like a tiny cutting tool.
The jagged surface of silica crystals doesn't just scratch. It shears micro-layers of polyurethane or wax finish with each pass. Over weeks and months, this creates finish failure: a hazy, dull appearance that no amount of mopping will fix. At that point, you're looking at a full resand and refinish, not a simple cleaning.
What makes this worse in coastal environments is grit size. Beach sand contains a mix of fine and coarse particles. Fine particles get trapped under socks and bare feet. Coarse particles act like ball bearings under shoes, dragging across the surface with even more contact pressure.
Which Floor Types Are Most Vulnerable to Sand and Grit
Hardwood flooring is the most vulnerable to sand damage because its finish layer is relatively thin, typically 3-5 mils of polyurethane. Engineered hardwood shares this vulnerability. Luxury vinyl plank (LVP) is more resistant but not immune. Stone and tile grout lines trap sand and can crack under sustained abrasive pressure. Carpet, counterintuitively, holds sand deep in its fibers and transfers it to hard floors at transition zones.
According to the National Wood Flooring Association's floor care guidance, abrasive grit is the leading cause of premature finish wear on hardwood floors, ahead of moisture and UV exposure.
Best Floor Mats for Sand: Stop Grit Before It Gets Inside
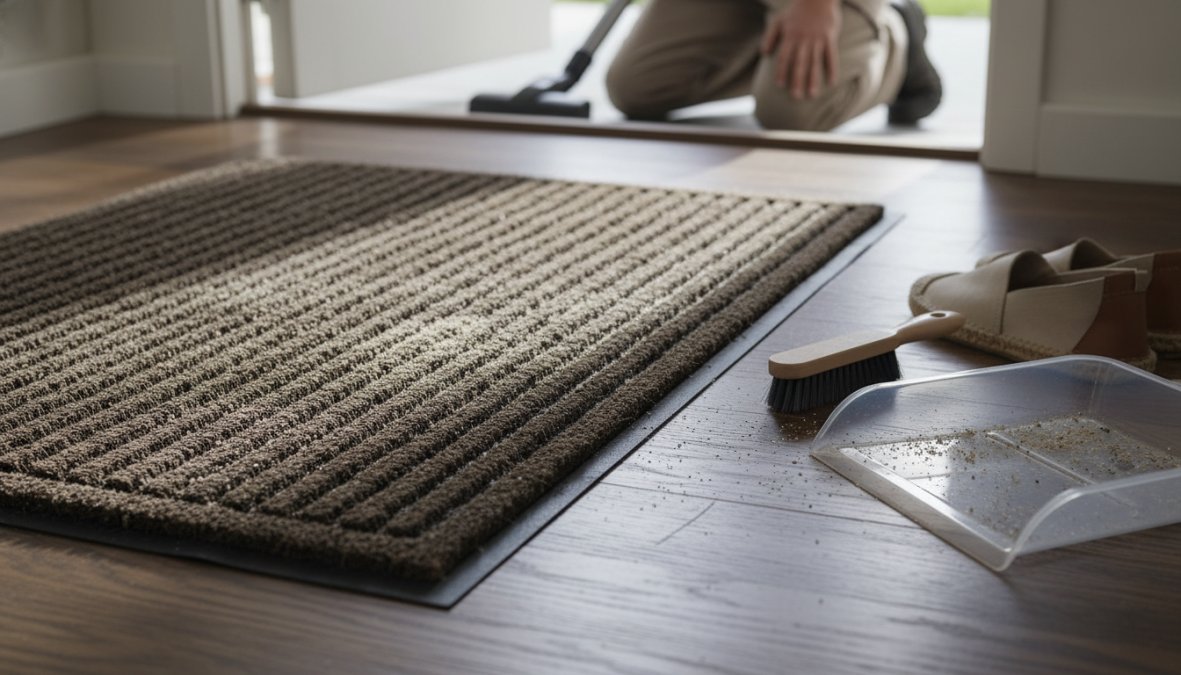
The most effective point of sand prevention is the threshold, not the floor itself. The best floor mats for sand are specifically engineered to capture and retain grit rather than just redistribute it, and the difference between a standard welcome mat and a sand-trapping mat is significant.
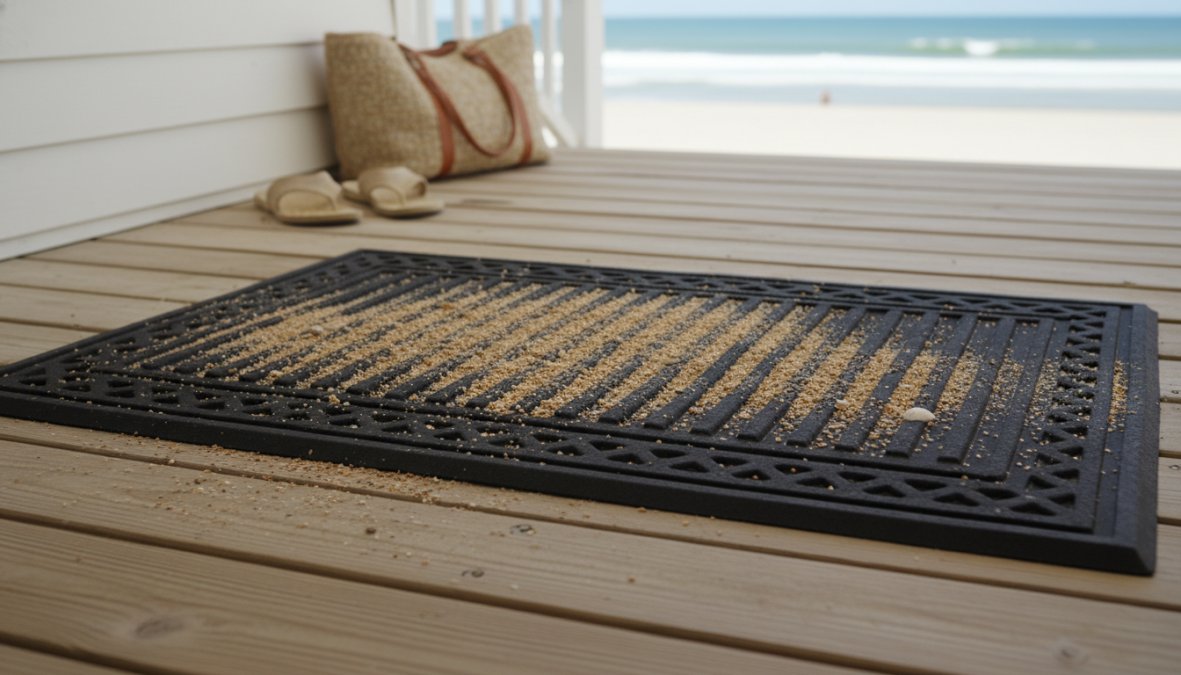
A basic coir mat will remove some surface sand. A properly spec'd sand-trapping mat will remove the fine silica particles that a coir mat misses entirely, and that's where most finish damage originates. Most guides stop at "use a mat." What they don't cover is why different mat materials perform differently against fine silica, and that difference is measurable.
Sand-Trapping Mat Technology: Material-by-Material Comparison
Sand-trapping mat technology works on two principles: mechanical scraping and particle retention. Scraping dislodges sand from shoe soles. Retention keeps those particles inside the mat structure rather than releasing them back onto the floor when the next shoe makes contact. The best entryway mats for coastal homes do both, but not all materials achieve both equally.
Coir (coconut fiber) mats Coir is the traditional choice and remains effective for coarse, dry sand. The stiff, irregular fibers create friction against shoe soles that physically dislodges larger particles. The problem is pore size: coir fiber weaves have relatively large gaps between fibers, which means fine silica particles, the ones below roughly 0.25mm that cause the most finish damage, fall through the mat and collect on the floor beneath it. Coir also holds moisture poorly, which means wet sand from shoes tends to pass through rather than being retained. For dry, coarse beach sand, coir is adequate. For fine coastal silica or wet conditions, it is not.
Rubber scraper mats Molded rubber mats with raised nubs, channels, or finger-like projections excel at mechanical scraping. The rigid surface creates consistent contact pressure across the entire shoe sole, and the channel geometry directs dislodged particles downward and away from the contact surface. Rubber mats with drainage holes are particularly effective because sand and water fall through the mat body rather than accumulating on the surface where they can be re-deposited. The limitation of rubber scraper mats is particle retention: once sand is dislodged, it sits in the channels. If the mat isn't cleaned regularly, those channels fill and the mat loses its scraping geometry entirely. A rubber scraper mat that hasn't been shaken out in a week may be actively redistributing sand rather than capturing it.
Microfiber mats Microfiber is the strongest performer for fine silica particle retention. The split-fiber construction, individual strands that are a fraction of the width of a human hair, creates a high-surface-area mesh that traps particles through a combination of electrostatic attraction and mechanical entanglement. Fine silica that passes straight through coir or sits loosely in rubber channels becomes embedded in microfiber pile. The trade-off is scraping performance: microfiber is soft and doesn't generate the friction needed to dislodge compacted sand from deep shoe treads. Microfiber mats also saturate faster in wet conditions, at which point their retention capacity drops sharply until they are dried.
The two-mat system: why material pairing matters
The reason a single mat never fully solves the problem is that no single material excels at both scraping and retention. The optimal system pairs materials by function:
- Exterior position: Rubber scraper mat or stiff coir mat. Primary job is mechanical dislodging of bulk sand from shoe soles. Drainage holes or open weave allows sand and moisture to fall away from the contact surface.
- Interior position: Microfiber or high-pile synthetic mat. Primary job is capturing the fine silica particles that passed through the exterior mat. This mat stays dry, which preserves its electrostatic retention properties.
This two-stage system addresses both particle sizes, coarse sand at the exterior, fine silica at the interior, and is the single highest-impact structural change you can make for preventing floor scratches in beach homes.
Mat Specifications That Actually Affect Performance
Beyond material, these physical specifications determine whether a mat performs or just looks like it does:
- Bristle or pile depth of at least 15mm. Shallow surfaces scrape or trap the top layer of sand but don't engage the full shoe sole depth where fine particles are embedded.
- Minimum mat length of 36 inches in the direction of travel. Most people take one step onto a mat before entering. Two full steps are required for effective cleaning of both feet. A 24-inch mat cleans one foot. A 36-inch mat cleans both.
- Rubber or vinyl backing with drainage holes on exterior mats. A sealed backing traps moisture and sand beneath the mat, creating a slurry that transfers to shoe soles on the next contact. Drainage holes allow both to escape downward.
- Washable construction on interior microfiber mats. A microfiber mat that can't be machine washed will become a sand reservoir within two to three weeks of peak beach season use.
Best Vacuum for Sand on Hardwood Floors: Specs That Actually Matter
The best vacuum for sand on hardwood floors is one with a dedicated hard floor setting, a motorized brush roll that can be fully disabled, and strong suction at low airflow velocity. Most standard vacuums are spec'd for carpet, and using them on hardwood with the beater bar engaged is nearly as damaging as not vacuuming at all.
Here's the problem with beater bar vacuums on hard floors: the rotating brush spins at high RPM and flings sand particles forward and sideways across the surface before suction can capture them. You're effectively sandblasting your own floor.
Specifications to prioritize when selecting a vacuum for sandy hardwood floors:
- Hard floor setting or suction-only mode. The beater bar must be fully disengaged, not just lowered.
- Soft rubber wheels and housing edges. Hard plastic wheels on a vacuum body can themselves cause surface scratches.
- Sealed dust system. Vacuums that exhaust fine particles back into the room redeposit silica dust onto the floor surface.
- HEPA filtration. Captures fine silica particles that standard filters pass through.
- Low-profile head with felt or soft-bristle perimeter. Allows the vacuum to reach debris at baseboard edges without dragging hard plastic across the finish.
Canister vacuums with bare-floor attachments generally outperform uprights for this application. The attachment head has less mass and contact pressure than a full upright body.
How to Clean Sand Off Hardwood Floors Without Scratching Them
Cleaning sand off hardwood floors without scratching them requires removing particles before any liquid touches the surface. This is the rule that most people violate, and it's why mopping a sandy floor causes more damage than it prevents.
Step-by-Step Safe Cleaning Routine for Sandy Floors
What you'll need: Hard-floor vacuum with beater bar off, microfiber dust mop, pH-neutral hardwood floor cleaner, microfiber flat mop.
Total time: 20-30 minutes for a standard room.
-
Vacuum first, always. Run the vacuum on hard floor setting across the entire surface. Work in overlapping passes, moving with the grain of the wood. Pay special attention to transition zones between rooms, where sand concentrates.
-
Follow with a dry microfiber dust mop. This captures fine silica particles the vacuum left behind. Do not use a feather duster or dry cloth, both of which scatter particles rather than collect them.
-
Spot-check before mopping. Run your hand lightly across a high-traffic section. If you feel any grit, repeat the vacuum and dust mop pass before introducing moisture.
-
Damp mop with a pH-neutral cleaner. Use a microfiber flat mop wrung nearly dry. Excess moisture is a separate damage vector for hardwood flooring. Work in sections, rinsing the mop pad frequently.
-
Allow to fully dry before foot traffic. A damp floor surface temporarily softens the finish, making it more vulnerable to abrasion from any residual grit.
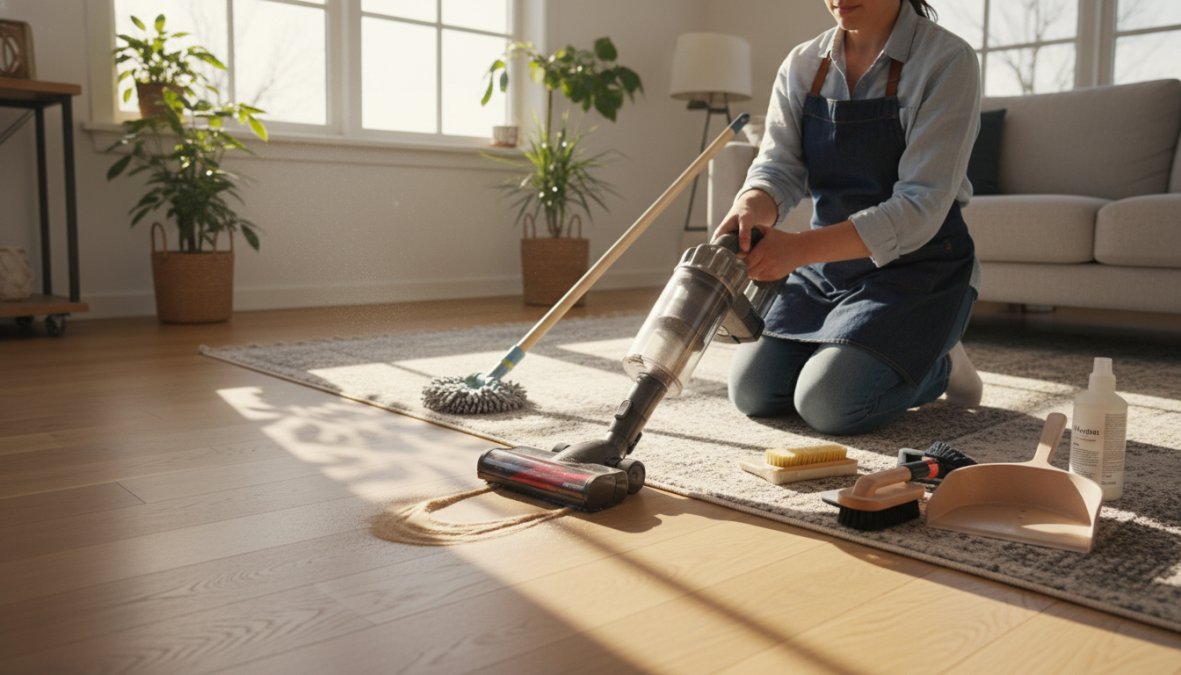
According to guidance from the Hardwood Floor Care Institute, dry cleaning methods should always precede wet cleaning on hardwood surfaces to prevent grit-induced micro-abrasions during the mopping stage.
Preventing Floor Scratches in Beach Homes: A Room-by-Room Strategy
Preventing floor scratches in beach homes requires treating each room differently based on its proximity to entry points and foot traffic patterns. A single strategy applied uniformly across the entire home misses the fact that sand concentration drops sharply with distance from the door.
The highest-risk zones are the entryway, mudroom, hallway, and any room directly adjacent to an exterior door. These areas need the most aggressive protection. Secondary zones include living areas and kitchens, where sand arrives on socks and bare feet after the initial entry. Bedrooms are lower risk but not zero risk, particularly in homes where beach gear is stored or changed.
| Zone | Risk Level | Priority Intervention |
|---|---|---|
| Entryway/Mudroom | Critical | Dual mat system, shoe-free policy |
| Adjacent hallways | High | Weekly vacuuming, floor runners |
| Living areas | Moderate | Regular vacuuming, protective finish |
| Bedrooms | Lower | Laundry management, door mats |
| Bathrooms | Low | Rinse station if available |
Shoe-Free Zone Policies and How to Enforce Them
A shoe-free zone is one of the most effective structural changes a homeowner can make to reduce sand damage, but enforcement is the part most guides skip over entirely.
The policy itself is straightforward: no shoes past the entry threshold. The execution requires making compliance easier than non-compliance. Provide a bench or seating at the entry point so removing shoes is convenient. Add a shoe rack or cubbies so there's an obvious place to put them. For guests, keep a basket of clean indoor slippers near the door.
The thing nobody tells you about shoe-free policies is that they fail most often with family members carrying items, not with guests. When someone's hands are full of grocery bags or beach gear, removing shoes becomes inconvenient and gets skipped. A hands-free shoe removal tool mounted near the door solves this specific failure point.
Pet-Specific Sand Management for Coastal Homes
Pets are a significant and underaddressed sand vector in coastal homes. Dogs returning from beach walks carry sand in their paw pads, between their toes, and in their coat. Unlike human shoes, paws make full contact with the floor surface on every step, distributing grit across a much larger area per entry event.
A dedicated pet entry routine makes a measurable difference:
- Keep a small tub of water and a towel at the exterior door for paw rinsing after beach visits.
- Use a low-pile entry mat specifically sized for pets to wipe paws before entering.
- Brush dogs with a stiff coat brush outside the home after beach outings. This removes sand from the coat before it falls onto interior floors.
- Trim paw pad hair on long-coated breeds. Sand embeds in this hair and releases slowly onto floors throughout the day.
How to Prevent Sand Damage to Floors with Protective Coatings and Finishes
A strong protective finish is the last line of defense when sand does make it past your entry management system. The finish absorbs the micro-abrasions that would otherwise reach the wood itself, and maintaining that finish layer is what extends the longevity of your floor by years.
The sandpaper effect works against the finish first. A well-maintained finish can be recoated before it fails completely. A neglected finish that reaches bare wood requires a full sand and refinish, which removes material from the floor itself and can only be done a limited number of times over the floor's lifespan. Understanding what your finish is made of, and how each chemistry responds to silica abrasion, is what separates a maintenance decision from a costly mistake.
How Different Finish Chemistries Respond to Silica Abrasion
Not all floor finishes wear the same way under sand. The chemistry of the finish determines both how quickly it degrades and which protective maintenance products will bond to it correctly.
Water-based polyurethane is the most common finish on factory-finished and site-finished hardwood installed in the last two decades. It cures to a hard, clear film that resists silica abrasion reasonably well when the film is intact. The vulnerability is at the micro-scratch level: water-based polyurethane has relatively low elongation, meaning it doesn't flex under point loads. Fine silica particles create clean shear cuts through the film rather than deforming around them. This produces the characteristic hazy, dull appearance of sand-damaged polyurethane. Water-based finishes accept water-based maintenance polishes and recoats well, but they will not bond correctly to oil-based products.
Oil-modified polyurethane cures more slowly and retains more flexibility than water-based formulations. This flexibility gives it slightly better resistance to the shear forces of fine silica because the film can deform marginally under point load before fracturing. Oil-modified finishes amber over time, which can mask early-stage haze from micro-abrasions, a cosmetic benefit that can also delay the recognition that recoating is needed. Oil-modified finishes require oil-modified maintenance products; applying a water-based polish over an oil-modified finish typically results in poor adhesion and peeling.
Aluminum oxide finish is found almost exclusively on factory-finished engineered hardwood and some prefinished solid hardwood. Aluminum oxide particles are embedded in the finish layer during manufacturing, creating a composite surface that is significantly harder than standard polyurethane. This finish type has the highest resistance to silica abrasion of any common residential floor finish. The trade-off is repairability: aluminum oxide finishes are difficult to recoat in the field because their hardness prevents new finish layers from bonding without professional abrasion preparation. For homeowners with aluminum oxide floors, the maintenance strategy shifts toward prevention almost entirely, since the recoating window is narrow.
Penetrating oil finishes (such as Rubio Monocoat, Osmo Polyx, and similar hardwax-oil products) work differently from film-forming finishes. Rather than building a surface layer, they penetrate the wood fiber and cure within it, leaving no distinct film on top. Silica abrasion on an oil-finished floor affects the wood surface directly rather than a sacrificial film layer. The advantage is that oil-finished floors can be spot-repaired and refreshed with a maintenance oil application without the full recoat process. The disadvantage is that the wood itself is more directly exposed to abrasive contact than it would be under a polyurethane film.
DIY Protective Coatings: Floor Polish and Sealants You Can Apply Yourself
DIY protective coatings for hardwood floors fall into two categories: maintenance polishes that add a thin sacrificial layer over the existing finish, and penetrating sealants that absorb into the wood to provide protection from below. Choosing the wrong category for your floor type is a common and costly mistake.
Maintenance floor polish is the correct choice for floors with an intact film finish (water-based or oil-modified polyurethane) that shows early signs of haze or dullness but has not worn through to bare wood. Polish works by depositing a thin acrylic or polymer layer over the existing finish, filling micro-scratches and rebuilding the surface thickness that silica abrasion has removed. This is a sacrificial layer strategy: the polish absorbs the next round of abrasion instead of the underlying finish.
Application process for maintenance polish:
- Clean the floor thoroughly using the vacuum-then-dust-mop sequence described in the cleaning section above. Any residual grit will be trapped under the polish layer and continue abrading from below.
- Confirm finish compatibility. Water-based polishes (the most common type) are compatible with water-based polyurethane. If your floor has an oil-modified finish, verify the polish label specifies compatibility.
- Apply with a flat microfiber applicator in thin, even coats, working with the wood grain. Thin coats cure evenly and bond better than thick applications.
- Allow the first coat to dry fully, typically 30 to 60 minutes depending on humidity, before applying a second coat.
- Two thin coats outperform one thick coat for both adhesion and clarity. A thick single coat is prone to streaking and uneven curing.
Apply maintenance polish every three to six months in high-traffic areas during peak beach season, and once before the start of winter to maximize finish thickness before salt season begins.
Penetrating sealants and hardwax oils are the correct choice for floors with oil finishes, or for floors where the polyurethane film has worn through in spots and a surface polish will not adhere to the bare wood areas. These products do not build a surface film; they absorb into the wood fiber and harden it. On a floor with a compromised film finish, applying a surface polish over bare wood patches will result in uneven adhesion and a blotchy appearance. A penetrating product addresses both the bare areas and the remaining finish zones in a single application.
How to Assess Whether Your Floor Needs Polish, Recoat, or Full Refinish
This is the decision point most guides skip, and getting it wrong is expensive. The three conditions require three different responses:
Polish (DIY, every 3-6 months): The finish is intact but dull or slightly hazy. Water beads on the surface. No bare wood is visible. Running your fingernail across the surface leaves no mark in the wood itself. This floor needs a maintenance polish application, not professional work.
Screen-and-recoat (professional, every 3-5 years in coastal homes): The finish shows consistent dullness across high-traffic paths that polish no longer corrects. Water no longer beads but the wood grain is not visibly exposed. A professional will lightly abrade (screen) the existing finish to create a bonding surface, then apply one or two new coats of finish. This process does not remove wood material. As noted by This Old House's hardwood floor refinishing guide, recoating a floor's finish every three to five years in high-traffic coastal homes is significantly more cost-effective than waiting for full finish failure.
Full sand and refinish (professional, when finish has failed to bare wood): Bare wood is visible in traffic paths. Water absorbs into the surface rather than beading. The floor feels rough underfoot in worn areas. At this stage, the finish has failed and micro-abrasions are now occurring directly against the wood fiber. A full refinish removes a thin layer of wood material to expose a fresh surface, then applies new finish from scratch. This is the outcome that a consistent polish and recoat schedule is designed to prevent.
Protecting Floors from Salt, Ice Melt, and Winter Slush Damage
Sand isn't the only abrasive threat to floors in coastal regions. Winter brings a second wave of damage in the form of calcium chloride ice melt, road salt, and slush. These substances are corrosive to floor finishes in ways that pure sand is not.
Calcium chloride, the active compound in most ice melt products, is hygroscopic. It draws moisture from the surrounding environment, including your floor finish, and creates a chemical reaction that breaks down polyurethane coatings faster than physical abrasion alone. Salt residue left on a hardwood floor doesn't just scratch; it actively degrades the finish chemistry.
The prevention approach mirrors the sand strategy but with added urgency around moisture:
- Place absorbent mats at all winter entry points, not just scraper mats. Slush needs to be absorbed, not just scraped off.
- Increase entry mat replacement frequency during winter months. A saturated mat holds salt solution against shoe soles and transfers it directly to the floor.
- Mop entry areas more frequently during salt season, using a pH-neutral cleaner that won't interact with salt residue.
- Apply a fresh coat of floor polish at the start of winter to ensure the protective finish is at maximum thickness before the corrosive season begins.
According to the American Hardwood Information Center's floor care resources, salt and ice melt residue should be cleaned from hardwood floors within 24 hours of exposure to prevent finish degradation.
How to Prevent Sand Damage to Floors: Building a Year-Round Maintenance Routine
The most important insight about how to prevent sand damage to floors is that prevention is a system, not an event. A single deep clean doesn't protect your floors. A consistent routine does.
The year-round maintenance routine breaks down by season:
Spring/Summer (peak sand season):
- Vacuum high-traffic areas two to three times per week using hard floor settings.
- Shake or clean entry mats every two to three days.
- Inspect floor finish monthly in high-traffic zones. Look for haze or dullness, which indicates finish wear.
- Apply maintenance floor polish to worn areas every three months.
Fall:
- Deep clean all floors before switching to winter protocols.
- Apply a full coat of floor polish across all hardwood surfaces.
- Replace entry mats with absorbent winter-rated options.
Winter:
- Increase mopping frequency in entry zones.
- Monitor for salt residue and clean within 24 hours of exposure.
- Keep calcium chloride and road salt away from interior thresholds.
Year-round:
- Enforce the shoe-free policy consistently.
- Follow the vacuum-then-mop sequence without exception.
- Schedule a professional floor inspection annually to assess finish condition before damage reaches the wood layer.
The teams at Hamptons carpet one floor and Home recommend that Suffolk County homeowners treat the spring-to-summer transition as the highest-risk window. That's when beach traffic spikes and sand volume entering homes increases dramatically. Getting your entry management system in place before Memorial Day weekend is the single most impactful timing decision you can make.
Protecting hardwood and stone floors in coastal Suffolk County is a year-round commitment, and the damage compounds faster than most homeowners expect. Hamptons carpet one floor and Home serves homeowners across Suffolk County with professional floor covering expertise, including guidance on protective finishes, floor selection for coastal environments, and maintenance recommendations tailored to beach-adjacent homes. Reach out to Hamptons carpet one floor and Home to get a professional assessment of your current floors and find out which protective treatments are right for your specific situation before the next beach season begins.
Frequently Asked Questions
Does sand scratch hardwood floors?
Yes, sand is highly abrasive because it contains silica and quartz particles with jagged, irregular surfaces. When tracked across hardwood flooring, these particles act like sandpaper, creating micro-abrasions and surface scratches with every footstep. Over time, this repeated abrasion wears through the protective finish, exposing raw wood underneath. This is why preventing sand damage to floors starts at the entryway, before grit ever reaches your hardwood.
What is the best way to clean sand off floors without scratching them?
The safest method to clean sand off hardwood floors without scratching is to vacuum first using a hard floor setting, never use a beater bar, which can grind grit deeper into the surface. Follow with a dry microfiber mop to capture remaining debris. Only then should you use a lightly damp mop. Avoid sweeping dry with a stiff broom, as this can drag abrasive grit across the finish and cause the same damage you're trying to prevent.
How do I protect my floors from sand in a beach house?
Preventing floor scratches in beach homes requires a layered approach: place high-quality sand-trapping mats at every entry point, establish a shoe-free zone policy, and vacuum frequently using a vacuum with a hard floor setting. Apply a quality floor polish or protective finish every season to maintain a barrier against grit. For coastal homes, also watch for salt and calcium chloride tracked in during winter, as these corrosive materials can accelerate finish failure alongside sand damage.
Can sand damage tile or laminate flooring?
Yes. While tile and laminate are generally more resistant than hardwood, sand and grit can still cause damage. On tile, abrasive silica particles scratch the glazed surface over time, dulling its appearance and making stone restoration necessary. On laminate, the wear layer, which protects the printed surface beneath, can be ground down by repeated sand abrasion, leading to premature finish failure. The same preventative steps that protect hardwood also extend the longevity of tile and laminate floors.
What features should I look for in the best vacuum for sand on hardwood floors?
When choosing the best vacuum for sand on hardwood floors, prioritize models with a dedicated hard floor setting that disables or retracts the beater bar. Look for strong suction with adjustable power, a sealed filtration system to prevent fine silica dust from recirculating, and a low-profile head that reaches under furniture. Canister vacuums and stick vacuums with soft brush rolls are generally safer for hardwood than upright models with aggressive rotating brushes.
How do you get sand out of floor crevices and gaps between boards?
Sand trapped in floor crevices requires a vacuum with a crevice tool attachment, this is the most effective method without risking scratches. Use a soft-bristle brush attachment to loosen compacted grit before vacuuming. Avoid using water or wet mopping as the first step, as moisture can push fine debris deeper into gaps and cause moisture damage to hardwood flooring. Regular vacuuming as part of your maintenance routine prevents heavy buildup in crevices over time.
This article was written using GrandRanker