 How-to
How to Remove Sand and Salt from Luxury Vinyl Plank
Table of Contents
- Why Sand and Salt Are Hard on Luxury Vinyl Plank
- What You'll Need Before You Start
- Step 1: Remove Loose Sand and Salt Before Anything Wet
- Step 2: How to Clean Dirt Out of Vinyl Floors With a Damp Mop
- Step 3: How to Remove Salt Residue From Vinyl Floors
- The Best Cleaner for Vinyl Plank Flooring (and Dilution Basics)
- What Not to Use on Luxury Vinyl Plank
- Protecting Wear Layers, Seams, and Entryways Year-Round
- Frequently Asked Questions
Last Updated: October 19, 2026
Why Sand and Salt Are Hard on Luxury Vinyl Plank
Sand and salt are the two most common causes of dull, scratched luxury vinyl plank in coastal homes. Sand acts like sandpaper underfoot.
The damage happens slowly, which is why it catches people off guard.
The good news: LVP is one of the toughest floors you can put in a beach house.
Below, we'll show you exactly how to remove sand and salt from luxury vinyl plank without harming the finish, and how to keep it from coming back.
What You'll Need Before You Start
Gather these supplies before you touch the floor. The right tools cost less than a single damaged plank replacement.
- Soft-bristled broom or dust mop
- Vacuum with a hard-floor attachment (no beater bar)
- Microfiber mop or microfiber cloths
Skip anything labeled abrasive, and skip bleach. We'll cover why in a later section.
Test any new cleaner on a hidden spot first, a closet corner or under a sofa, and let it dry completely before judging the result.
Step 1: Remove Loose Sand and Salt Before Anything Wet
The first step is always dry removal.
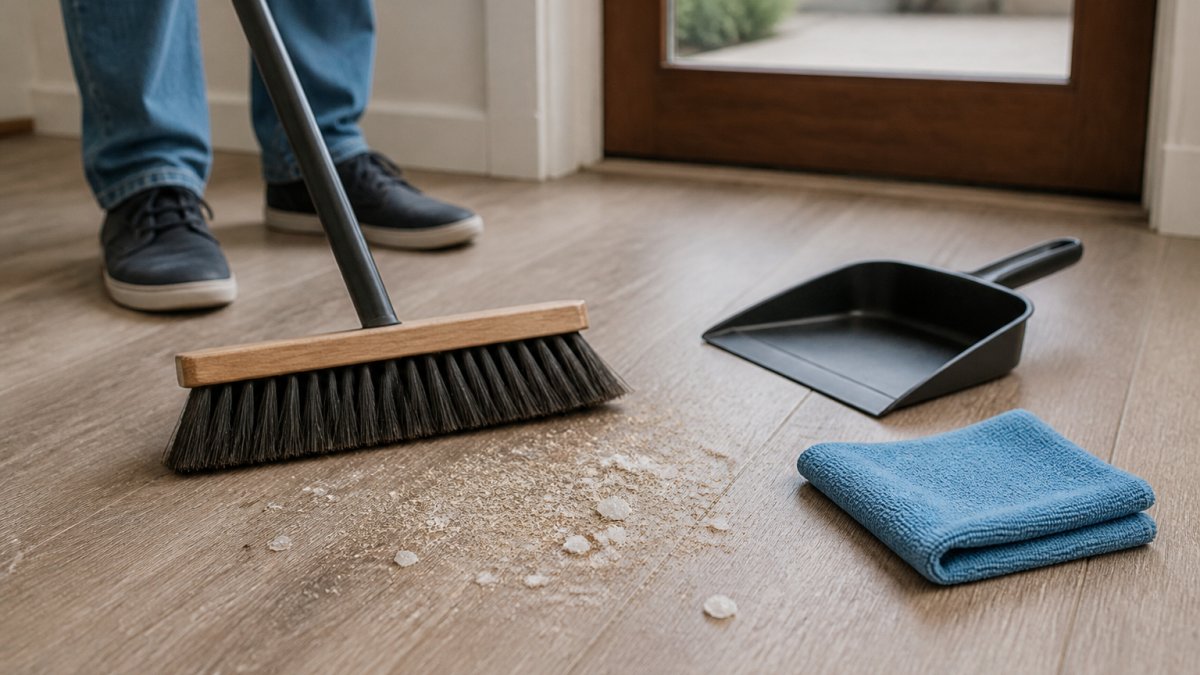
Use a soft-bristled broom and work from the far corner toward the door. Short strokes, light pressure.
For a more thorough pass, switch to a vacuum with a hard-floor attachment. Turn off the beater bar.
Pay extra attention to three zones:
- The entryway mat and the strip of floor just past it
- Under chairs and along baseboards where grit collects
- Seams between planks, where fine sand settles
If you can still feel grit under your hand, keep going, wet cleaning only works on a debris-free floor.
Step 2: How to Clean Dirt Out of Vinyl Floors With a Damp Mop
Once the floor is dry and debris-free, switch to a damp mop. The key word is damp, not wet.
Here is the method we recommend:
- Fill one bucket with warm water and the dose of pH-neutral cleaner on the label.
- Fill the second bucket with plain warm water for rinsing.
- Dip the microfiber mop, then wring it out until it is barely damp.
- Mop in small sections, following the plank direction.
- Rinse the mop in the clean bucket and go over the same area again.
- Dry the floor with a clean microfiber cloth or dry pad.
Rinsing matters more than most people think. Cleaner left on the floor attracts new dirt and dries into a film that makes a "clean" floor look hazy a day later.
Change your water often. On a heavily tracked floor, dirty water just moves grit around. Fresh water in both buckets does more for the finish than extra scrubbing ever will.
Step 3: How to Remove Salt Residue From Vinyl Floors
Salt residue is not one problem. It shows up in three distinct forms, and each needs a different approach. Treating them all the same is why so many people scrub a white film for ten minutes and watch it reappear the next day.
Identify the type of salt residue first
Before you touch a cloth to the floor, match what you see to one of these three categories:
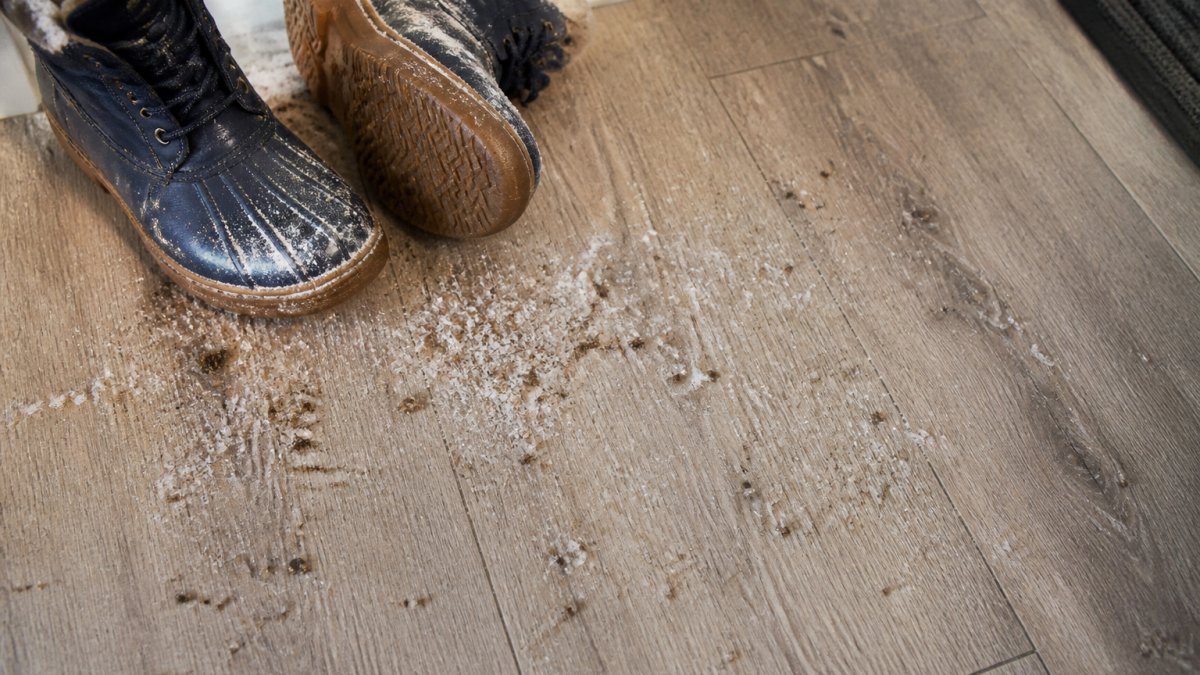
- Loose road salt crystals. Visible white or gray granules, usually just inside the door or in a trail from the entry. These are still solid and abrasive. Do not wipe them wet. Sweep or vacuum them up first, exactly as in Step 1.
- Dried white film or haze. A chalky, uniform whitish layer that appears after moisture evaporates. It is often a mix of salt and dried cleaner residue. It smears when damp-mopped and looks worse before it looks better.
- Tracked-in sand with salt. Gritty, darker residue that feels rough underfoot and collects along seams and baseboards. The sand is the abrasive; the salt is the mineral film. Remove the grit dry first, then treat the mineral film.
Method for loose road salt crystals
- Sweep with a soft-bristled broom, working from the far corner toward the door.
- Vacuum with a hard-floor attachment and the beater bar off.
- Check with your hand. If you feel grit, repeat. Do not move to a wet method until the floor is grit-free.
Loose crystals are the easiest stage to handle and the most damaging if you skip it. A single pass with a wet mop turns them into a brine that pushes into seams.
Method for dried white film and haze
This is the mineral problem. Plain water smears it. You need a weak acid rinse, a short dwell, and a clean rinse.
- Mix a weak vinegar solution: 1/4 cup of plain white vinegar to 1 gallon of warm water. That is roughly a 1:64 ratio. Keep it weak; stronger is not better on a vinyl wear layer.
- Dampen a microfiber cloth or microfiber mop pad with the solution and wring it until it is barely damp. It should not drip.
- Wipe the affected area in the direction of the planks. Let the solution sit for 30 to 60 seconds, no longer. Do not let it pool or dry on the floor.
- Rinse immediately with a clean microfiber pad dampened with plain warm water.
- Dry with a clean, dry microfiber cloth. Do not air-dry. Residual moisture pulls new salt from the air and the film returns.
If the film is heavy, repeat the cycle once. If it is still there after two passes, stop and check your flooring care guide before trying anything stronger. Repeated strong vinegar treatments can dull the finish over time.
Method for crusty patches at seams
Salt that has dried in a seam needs contact time, not scrubbing.
- Dampen a microfiber cloth with the same weak vinegar solution.
- Fold it and hold it against the patch for 1 to 2 minutes. Do not rub.
- Wipe along the seam, not across it, with light pressure.
- Rinse with a clean damp cloth and dry thoroughly.
- If the seam edge lifts or feels rough after drying, stop. That is a repair question, not a cleaning one.
Why rinsing and drying matter more than the cleaner
Salt is hygroscopic, it pulls moisture from the air. A floor that is rinsed but left damp will grow a new white film within a day, while one rinsed and dried completely stays clear. On a coastal floor, drying is what makes the treatment last.
The Best Cleaner for Vinyl Plank Flooring (and Dilution Basics)
The best cleaner for luxury vinyl plank is a pH-neutral formula made for vinyl or resilient floors, mixed weaker than you think and rinsed completely. What matters is the ratio, the dwell time, and knowing when to read the manufacturer's care guide instead.
Start with the manufacturer's care guide, not the bottle
Every LVP product has a care guide, and the guide overrides general advice. Before you buy a cleaner, find the care instructions for your specific plank, usually on the manufacturer's website or in the installer's paperwork. Look for three things:
- Approved cleaner types. Most list pH-neutral vinyl cleaners as approved.
- Prohibited ingredients. Many explicitly warn against abrasive cleaners, bleach, oil-based soaps, wax, and steam.
- Warranty language. Some warranties require specific cleaning practices. Using a prohibited product can void coverage on a wear-layer failure.
If the guide is silent on a product, treat that as a no. A generic cleaner is not worth a warranty claim.
Dilution ratios that actually work
More cleaner does not mean a cleaner floor, overdosing leaves a film that traps new grit and dulls the floor within days. Use these as starting points, then follow the label if it specifies otherwise:
- Routine damp mopping: mix the pH-neutral cleaner at the label's light-duty dose, typically 1 to 2 ounces per gallon of warm water. When in doubt, use the lower end.
- Spot cleaning: one drop of pH-neutral cleaner on a damp microfiber cloth. No bucket needed.
- Mineral film (salt haze): 1/4 cup plain white vinegar per gallon of warm water, roughly 1:64. Use only for occasional mineral spots, not weekly mopping.
Use warm water, not hot. Hot water can affect adhesives over time, especially at seams.
Dwell time and rinse steps
Dwell time is where most cleaning goes wrong in both directions, too short to lift the soil, or long enough to dry into a film.
- Apply the damp mop or cloth. Let the cleaner sit for 15 to 30 seconds on routine soil.
- For sticky or film-like residue, extend to 60 seconds, no longer. Do not let it dry on the floor.
- Rinse with a clean microfiber pad dampened with plain warm water.
- Dry with a clean, dry microfiber cloth or dry pad.
When household solutions may be unsuitable
Diluted vinegar is fine for occasional mineral spots on most LVP, but it is not a universal cleaner. Check the care guide first if:
- The manufacturer lists vinegar or acidic cleaners as prohibited.
- The floor has a factory-applied coating or finish that the guide says to protect.
- You are cleaning near seams, edges, or transitions where moisture can wick under the plank.
Never combine products. Cleaner plus vinegar plus dish soap is not a stronger cleaner; it is a residue problem and a possible chemical reaction. Mix only what you need for one session and never store a mixed bucket.
A quick compatibility check before you buy
| Cleaner type | Routine use on LVP | Notes |
|---|---|---|
| pH-neutral vinyl cleaner | Yes | Dilute per label; rinse and dry |
| Weak white vinegar solution | Occasional mineral spots only | 1:64 ratio; check care guide first |
| Bleach | No | Can dull finish; unnecessary |
| Oil-based or moisturizing soap | No | Leaves slick film that attracts dirt |
| Abrasive or scouring products | No | Scratches wear layer |
| Steam mop | No | Heat and moisture can reach seams |
| Wax or polish | No | Builds up and turns hazy on factory finish |
When the guide and the bottle disagree, the guide wins. That single rule prevents most of the cleaner-related damage we see on luxury vinyl plank.
What Not to Use on Luxury Vinyl Plank
Some cleaners do real damage to luxury vinyl plank, and the harm often shows up months later. Keep these off the floor:
- Abrasive cleaners and scouring pads. They scratch the wear layer, and scratches trap grit permanently.
- Bleach. It can dull the finish and is unnecessary for routine cleaning.
- Oil-based soaps and moisturizing cleaners. They leave a slick film that attracts dirt and can make the floor slippery.
Also avoid the "more is better" habit, a weak mix used consistently beats a strong mix used once.
Protecting Wear Layers, Seams, and Entryways Year-Round
The best sand and salt removal is the kind you never have to do. Prevention protects the wear layer, keeps seams tight, and adds years to the floor.
Start at the door. A quality entry mat does most of the work.
Other habits that make a real difference:
- Ask everyone to remove shoes at the entry, especially in winter.
- Sweep high-traffic zones two or three times a week during salt season.
- Wipe up spills and tracked-in slush right away.
If a plank is already scratched or a seam has lifted, that is a repair question, not a cleaning one.
Sand and salt will find their way inside, no matter how careful you are. If your luxury vinyl plank is past cleaning and ready for replacement, Hamptons carpet one floor and Home can help.
Frequently Asked Questions
Can salt damage luxury vinyl plank flooring?
Salt itself won't melt LVP, but the grit that rides in with it can. Trapped sand and salt crystals act like sandpaper underfoot, dulling the wear layer and scratching the finish over time. Left wet, salt residue also dries into a white film that hides the plank pattern and attracts more dirt. The bigger risk is the cleaning method: scrubbing dried salt with an abrasive pad or a strong cleaner can strip the finish faster than the salt would. Sweep or vacuum dry grit first, then use a damp microfiber mop with a manufacturer-approved cleaner.
How often should I clean sand and salt off LVP?
During winter or any stretch when salt is on walkways, sweep or vacuum high-traffic areas daily and damp mop every few days. In coastal homes where sand gets tracked in year-round, a quick dry sweep at entryways each day plus a full damp mop once a week keeps buildup from settling into seams. If you can feel grit underfoot or see a white haze near doors, it's time to clean. Regular light cleaning protects the wear layer better than occasional deep scrubbing.
Can I use rubbing alcohol on LVP flooring?
A diluted rubbing alcohol solution can lift sticky spots and some salt film, but use it sparingly and never as a routine cleaner. Isopropyl alcohol can dull the finish with repeated use, and it should never sit on the floor. For everyday sand and salt removal, warm water with a few drops of mild dish soap or a pH-neutral vinyl cleaner is safer. Save alcohol for spot cleaning stubborn marks, then rinse the area with clean water and dry it.
What is the safest way to mop luxury vinyl plank?
Use a microfiber mop that's damp, not dripping. Too much water can seep into seams and under planks, causing edges to lift. Fill a bucket with warm water and the correct dose of a pH-neutral cleaner, wring the mop well, and work in small sections. Rinse with clean water to remove residue, then dry with a microfiber cloth so no film is left behind. Avoid steam mops, which push heat and moisture into seams, and never let standing water sit on the floor.