 How-to
How to Repair Scratches on Luxury Vinyl Plank
Table of Contents
- Identifying the Depth of Scratch Damage
- Tools and Materials You'll Need
- Step-by-Step Repair Process for Surface Scuffs
- Best Scratch Repair Kit for Vinyl Flooring Methods
- How to Fix Deep Gouges in Luxury Vinyl Plank
- Preventing Scratches on Luxury Vinyl Plank
- When to Replace a Plank vs. Repair
- Conclusion
Last Updated: August 21, 2026
Identifying the Depth of Scratch Damage
Not all scratches on luxury vinyl plank are created equal. Identifying the damage depth determines which repair method will work best.
Surface scuffs affect only the wear layer, the clear protective coating on top of the plank, and typically appear as white or light-colored marks. You can usually feel them with your fingernail, but they don't penetrate into the design layer beneath. Grit and sand are common culprits, acting like sandpaper under shoes or chair legs, according to Carpet Concepts' guide on vinyl flooring damage.
Medium scratches cut through the wear layer and into the design layer, the printed image that gives your floor its wood grain or stone texture. You'll see the actual plank material, and the scratch is visible from multiple angles in the room.
Deep gouges penetrate through the design layer and into the core material, the WPC (wood-plastic composite) or SPC (stone-plastic composite) layer that gives the plank its structural integrity. These are impossible to hide with touch-up markers or buffing alone. According to Partek Floors' analysis of LVP durability, high-quality LVP with a wear layer of at least 20 mil or higher is highly scratch-resistant.
To identify which category you're facing, grab a flashlight and examine the scratch at an angle. If light reflects off a white line, you're looking at a surface scuff. If you can see color variation or texture change, you've got a medium scratch. If the plank material itself is exposed and visible from across the room, that's a deep gouge.
Tools and Materials You'll Need
Having the right materials on hand before you start makes the difference between a seamless repair and a frustrating afternoon spent hunting for supplies.
For surface scuffs and minor marks:
- Microfiber cloth (lint-free)
- pH-neutral vinyl floor cleaner
- Isopropyl alcohol (optional, for stubborn marks)
- Soft-bristled brush
For medium scratches:
- Wax repair stick or filler compound (color-matched to your plank)
- Touch-up marker (matching your floor's color and finish)
- Small putty knife or scraper
- Microfiber cloth
- Vinyl floor sealer or finish
- Buffing pad (soft, non-abrasive)
For deep gouges:
- Color-matched vinyl or laminate repair putty
- Small putty knife
- Sandpaper (fine-grit, 220-grit or higher)
- Microfiber cloth
- Vinyl floor sealer
- Buffing pad
- Heat pen (optional, for blending)
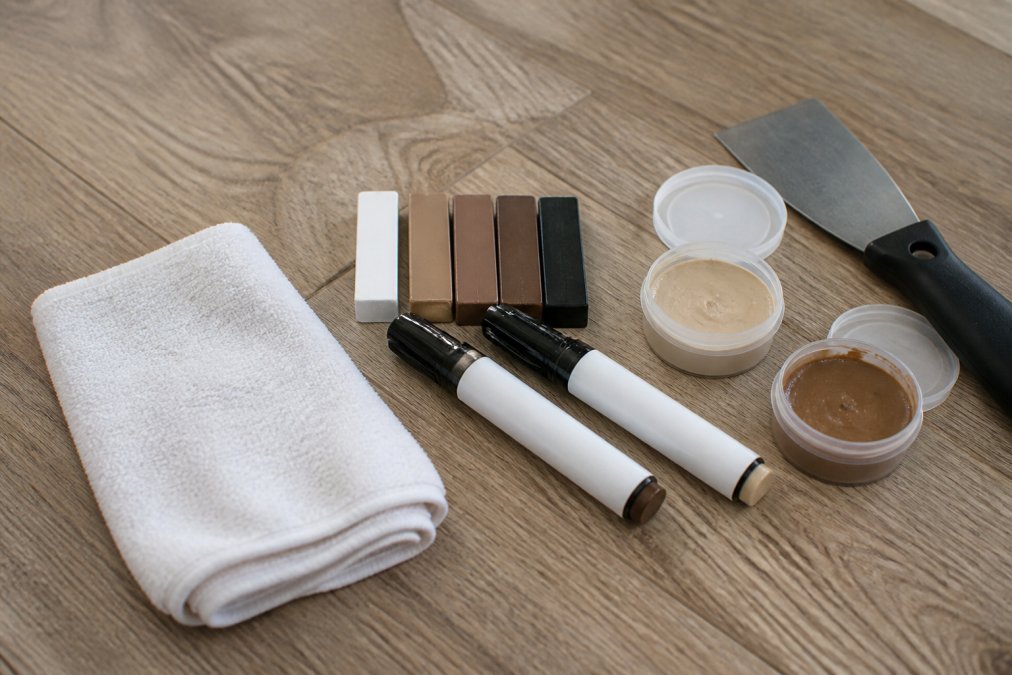
A basic repair kit for small LVP chips or scratches costs under $10 in materials, according to Final Floors LLC's repair guide. The key is matching your plank's color and finish as closely as possible. Most manufacturers provide color codes, so contact your flooring supplier or check your original purchase documentation.
At Hamptons Carpet One Floor & Home, we recommend keeping a small repair kit on hand, especially if you have high-traffic areas or pets.
Step-by-Step Repair Process for Surface Scuffs
Surface scuffs are the easiest scratches to fix, and you can often restore your floor to near-original condition in under 30 minutes.
Step 1: Clean the affected area thoroughly
Vacuum or sweep the scratch and surrounding area to remove loose debris. Dampen your microfiber cloth with pH-neutral vinyl floor cleaner and wipe the scratch clean. Let it dry completely.
Step 2: Assess the scuff with light
Use a flashlight to examine the mark at different angles. If it disappears when light hits it from certain directions, you're likely dealing with a surface-level scuff that buffing alone can fix.
Step 3: Buff the area gently
Using a soft-bristled brush or microfiber cloth, buff the scuff in circular motions with moderate pressure. For stubborn marks, dampen the cloth slightly with isopropyl alcohol and continue buffing. This simple process is effective for 90% of superficial marks.
Step 4: Wipe clean and inspect
After buffing, wipe the area clean with a dry microfiber cloth. Inspect the result under different lighting conditions. If the scuff is gone, you're done.
Step 5: Apply finish if needed
If buffing alone doesn't completely remove the scuff, apply a thin layer of vinyl floor sealer to the area. This restores shine and can make minor remaining marks nearly invisible. Allow the sealer to cure according to product instructions, typically 2-4 hours, before allowing foot traffic.
Best Scratch Repair Kit for Vinyl Flooring Methods
When buffing and cleaning don't fully resolve a scratch, repair kits with wax sticks and touch-up markers become your best option. These products are specifically formulated to match vinyl flooring colors and finishes.
Using Wax Repair Sticks and Touch-Up Markers
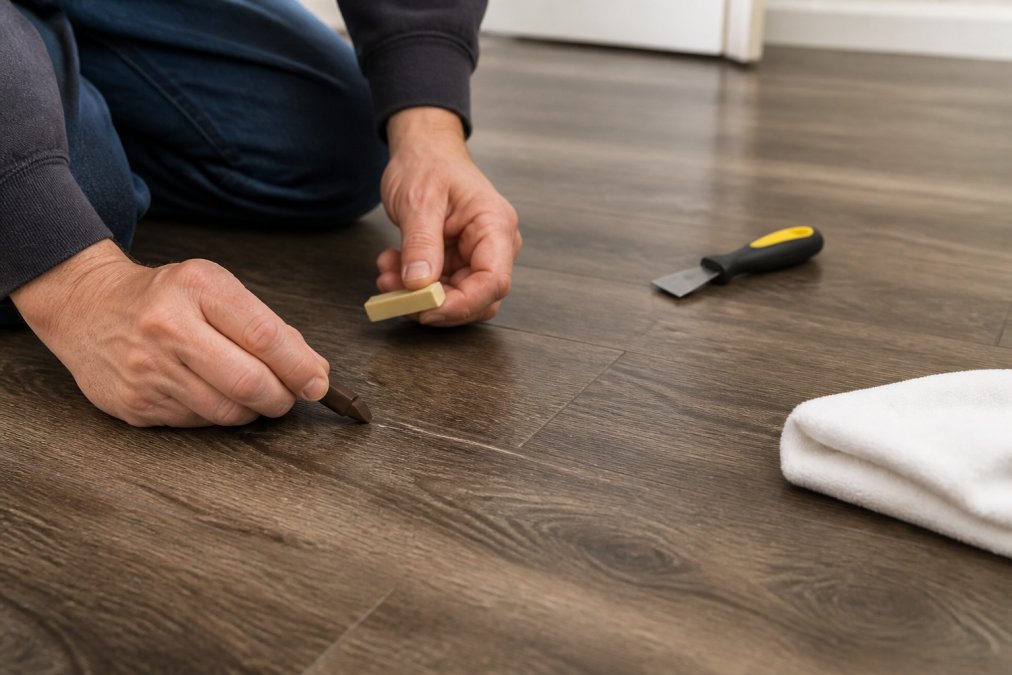
Wax repair sticks work by filling the scratch with a color-matched compound that hardens and blends with the surrounding plank. Touch-up markers use pigmented ink to mask discoloration.
For wax repair sticks:
- Clean the scratch thoroughly and let it dry completely
- Select a wax stick that matches your plank's color, test it on an inconspicuous area first
- Apply the wax by rubbing the stick directly into the scratch, filling it completely
- Use a putty knife to smooth the excess wax flush with the plank surface
- Allow the wax to cure (typically 24 hours) before buffing
- Once cured, gently buff the area with a microfiber cloth to blend the repair
For touch-up markers:
- Clean the scratch and allow it to dry
- Shake the marker well to distribute pigment evenly
- Apply the marker directly into the scratch with light, even strokes
- Allow the ink to dry (usually 15-30 minutes)
- If needed, apply a second coat for deeper color matching
- Once dry, buff lightly with a microfiber cloth to blend the edges
The key to both methods is patience. Rushing the application or buffing before the product fully cures will compromise the repair.
Buffing and Blending Techniques
Buffing transforms a visible repair into a seamless fix. After applying wax or touch-up marker, proper buffing makes the repair nearly invisible by feathering the edges and matching the surrounding finish.
Use a soft-bristled brush or microfiber cloth with light to moderate pressure. Work in circular motions, gradually expanding outward from the repair to blend it with the surrounding plank. For multi-tonal or textured planks, applying a vinyl floor sealer to the entire affected area can help mask the difference by creating uniform shine across the surface.
How to Fix Deep Gouges in Luxury Vinyl Plank
Deep gouges require a different approach. Since they penetrate the core material, surface repairs won't hold up to foot traffic or cleaning. You have two realistic options: professional plank replacement or accepting the damage as part of the floor's character.
If you choose to repair, the process is more involved and results may not be perfect. Deep gouges expose the plank's inner material, which absorbs moisture and can deteriorate over time.
Step 1: Clean and prepare the gouge
Vacuum and wipe the area thoroughly. Use a small brush or cloth to remove any loose material from inside the gouge. Allow it to dry completely.
Step 2: Fill the gouge with repair putty
Select a color-matched vinyl or laminate repair putty. Apply it using a putty knife, overfilling slightly. Smooth the surface flush with the plank, removing excess putty. Allow the putty to cure according to product instructions, typically 24 hours.
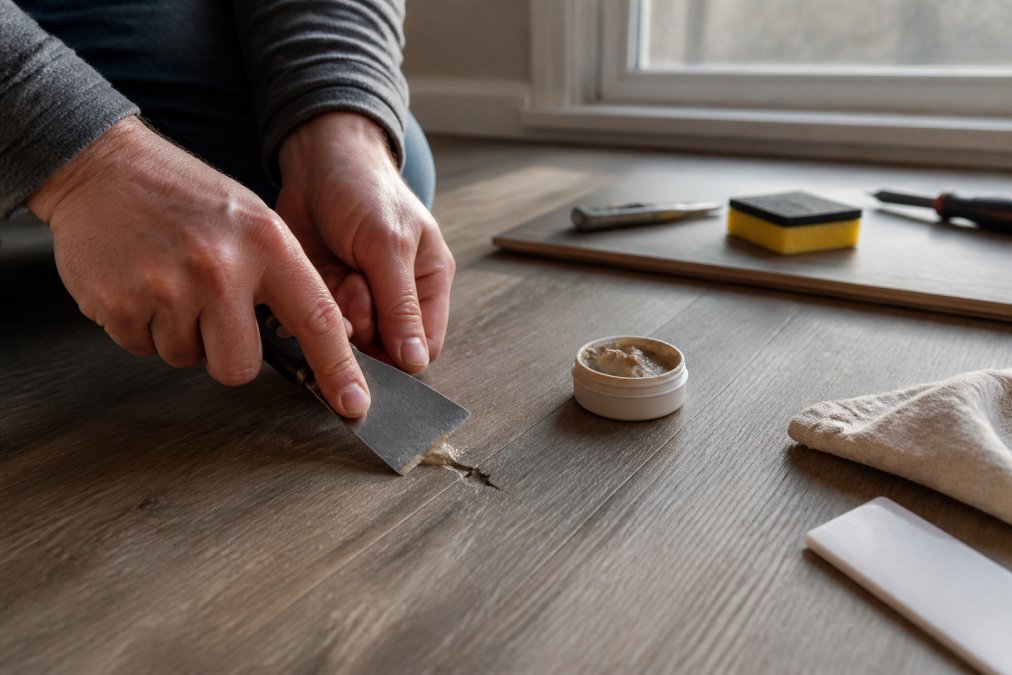
Step 3: Sand and smooth the repair
Once fully cured, use fine-grit sandpaper (220-grit or higher) to gently sand the putty flush with the plank surface. Work carefully to avoid sanding into the surrounding plank. Wipe away dust with a damp cloth and allow to dry.
Step 4: Color-match with touch-up marker
The putty may not match your plank's color exactly. Use a touch-up marker to adjust the color and blend the repair. Apply thin coats and allow drying between applications.
Step 5: Seal and finish
Apply a vinyl floor sealer to the repaired area and surrounding section to protect the repair and restore finish consistency. Allow full curing before allowing foot traffic.
When deep gouge repair fails: If the repair doesn't hold up after a few months, or if the gouge is larger than 1/8 inch wide, professional plank replacement is your best option. Replacing individual planks costs depend on plank accessibility and labor rates. If you need professional assessment or full plank replacement, our team has the expertise to handle complex installations.
Preventing Scratches on Luxury Vinyl Plank
The best repair is the one you never have to make. Preventing scratches requires understanding what causes them and implementing simple protective measures.
Unprotected furniture movement is a major culprit. Rolling chairs with narrow, hard casters dig into the wear layer. Use furniture pads under all movable pieces, felt pads for light furniture and rubber pads for heavy items.
Grit and sand tracked in on shoes cause the most consistent damage over time. Place quality entry mats outside doors and inside entryways to trap debris before it reaches your flooring. Vacuum regularly, at least 2-3 times weekly in high-traffic areas.
Pet nails are another cause of scratches. Keeping nails trimmed reduces the risk of deep gouges. Soft rugs or runners in areas where pets spend the most time add extra protection.
Avoid dragging vacuum cleaners with hard brush rolls across the floor. Use a soft-bristled attachment or switch to a broom for spot cleaning. When mopping, use only pH-neutral vinyl floor cleaners and avoid excess water, which can seep into seams and cause swelling.
For high-traffic areas, consider applying a protective topcoat annually. This refreshes the wear layer's protective qualities and can extend the overall lifespan of your flooring. When properly selected and installed, luxury vinyl flooring can last 15 to 25 years or more in residential settings, but preventive maintenance significantly extends this lifespan.
When to Replace a Plank vs. Repair
The decision to repair or replace depends on damage severity, location, and budget.
Repair if:
- The damage is a surface scuff or light-to-medium scratch
- The gouge is smaller than 1/8 inch wide
- The damage is in a low-visibility area
- You're comfortable with a repair that may be slightly visible up close
- The cost of materials ($10-50) is worth it to you
Replace if:
- The gouge is deeper than 1/8 inch or wider than 1/4 inch
- The damage is in a high-traffic or visible area
- The plank shows signs of moisture damage or delamination around the gouge
- Multiple planks in the same area are damaged
- You want a perfect, invisible repair
Replacing individual planks costs depend on material and space size. If you have multiple damaged planks or extensive damage, full floor replacement may be more cost-effective than spot repairs.
Conclusion
Scratches on luxury vinyl plank are frustrating, but most are fixable with the right approach and materials. Surface scuffs disappear with buffing and cleaning. Medium scratches blend seamlessly with wax sticks and touch-up markers. Deep gouges require more aggressive repair or plank replacement.
The key is identifying damage depth early and addressing it promptly. At Hamptons Carpet One Floor & Home, we help homeowners and contractors select durable LVP options and provide expert guidance on maintenance and repair. When you need professional assessment or full plank replacement, our team has the expertise to handle complex installations. Contact us for a consultation on protecting and maintaining your investment.
=== FAQ ANSWERS (audit these too, same rules) ===
[1] Q: Is there a kit that can repair scratches on vinyl plank flooring? A: Yes. Repair kits for luxury vinyl plank typically include color-matched filler compound, applicators, and microfiber cloths. A basic repair kit for small LVP chips or scratches costs under $10 in materials. For best results, choose a kit that matches your plank's color and finish. Many kits work well for surface scuffs and minor gouges, though deep damage may require plank replacement.
[2] Q: What causes scratches on luxury vinyl plank flooring? A: Grit and sand tracked in on shoes act like sandpaper under foot traffic. Pet nails, especially on darker matte finishes, leave light scuffs. Dragging furniture without protective pads and rolling chairs with hard, narrow casters also cause scratches. High heels and concentrated weight from heavy furniture can create dents. Abrasive cleaning pads and vacuum cleaners with hard brush rolls contribute to surface damage.
[3] Q: Can deep scratches in vinyl plank be restored, or do I need to replace the plank? A: Surface scratches and light gouges can be repaired with filler compound or wax sticks. However, deep gouges that penetrate the wear layer and design layer often require plank replacement. If damage extends through multiple layers or affects the plank's structural integrity, replacement is the better option. Surface-level scratches can be reduced in visibility with repair products, but the wear layer cannot be refinished like hardwood.
[4] Q: How do I prevent future scratches on my luxury vinyl plank? A: Use protective pads under furniture legs and place mats at entry points to trap sand and grit. Trim pet nails regularly and use felt pads under chair casters. Avoid dragging appliances or heavy items across the floor. Sweep or vacuum regularly with a soft brush roll to remove abrasive particles. Choose LVP with a wear layer of at least 20 mil thickness for better scratch resistance. Regular maintenance extends floor life to 15-25 years or more.
Frequently Asked Questions
Is there a kit that can repair scratches on vinyl plank flooring?
Yes. Repair kits for luxury vinyl plank typically include color-matched filler compound, applicators, and microfiber cloths. A basic repair kit for small LVP chips or scratches costs under $10 in materials. For best results, choose a kit that matches your plank's color and finish. Many kits work well for surface scuffs and minor gouges, though deep damage may require plank replacement.
What causes scratches on luxury vinyl plank flooring?
Grit and sand tracked in on shoes act like sandpaper under foot traffic. Pet nails, especially on darker matte finishes, leave light scuffs. Dragging furniture without protective pads and rolling chairs with hard, narrow casters also cause scratches. High heels and concentrated weight from heavy furniture can create dents. Abrasive cleaning pads and vacuum cleaners with hard brush rolls contribute to surface damage.
Can deep scratches in vinyl plank be restored, or do I need to replace the plank?
Surface scratches and light gouges can be repaired with filler compound or wax sticks. However, deep gouges that penetrate the wear layer and design layer often require plank replacement. If damage extends through multiple layers or affects the plank's structural integrity, replacement is the better option. Surface-level scratches can be reduced in visibility with repair products, but the wear layer cannot be refinished like hardwood.
How do I prevent future scratches on my luxury vinyl plank?
Use protective pads under furniture legs and place mats at entry points to trap sand and grit. Trim pet nails regularly and use felt pads under chair casters. Avoid dragging appliances or heavy items across the floor. Sweep or vacuum regularly with a soft brush roll to remove abrasive particles. Choose LVP with a wear layer of at least 20 mil thickness for better scratch resistance. Regular maintenance extends floor life to 15-25 years or more.
This article was written using GrandRanker