 Ultimate guide
Luxury Vinyl Plank Flooring: The 2026 Buyer's Guide
Table of Contents
- What Makes Luxury Vinyl Plank Flooring Worth Considering
- Waterproof Capabilities, Durability, and Scratch Resistance
- Luxury Vinyl Plank vs Laminate: Key Differences Explained
- Room-by-Room Recommendations for LVP Flooring
- Installing LVP Flooring DIY: What You Need to Know
- LVP Flooring Installation Cost and Pricing Breakdown
- How to Clean Luxury Vinyl Plank Flooring and Keep It Looking New
- What Most Guides Don't Tell You About LVP
- Conclusion: Is Luxury Vinyl Plank Flooring Right for Your Home?
Last Updated: May 24, 2026
Choosing new floors is one of the most consequential decisions you'll make for your home, and luxury vinyl plank flooring has become the answer for homeowners who want the look of hardwood without the maintenance headaches. At Hamptons carpet one floor and Home, we've helped hundreds of Suffolk County homeowners navigate this exact decision, and the questions we hear most often come down to durability, waterproofing, installation complexity, and long-term value. This guide covers all of it. Below, we'll show you exactly how to evaluate LVP flooring options, what the technical specs actually mean, and which rooms get the most benefit from vinyl plank.
Here's what most guides get wrong: they treat all LVP as interchangeable. The difference between a 6-mil wear layer and a 20-mil wear layer is not a footnote. It's the difference between a floor that lasts five years and one that lasts twenty-five.
What Makes Luxury Vinyl Plank Flooring Worth Considering
Luxury vinyl plank flooring is a multi-layer synthetic flooring product engineered to replicate the look of hardwood or stone while delivering waterproof performance and scratch resistance that real wood cannot match. The core construction typically includes a wear layer, a printed design layer, a rigid core, and a backing layer, each serving a specific structural or aesthetic function.
The category has evolved significantly. Early vinyl flooring had a reputation for looking cheap and feeling hollow underfoot. Modern LVP, particularly rigid-core formats, addresses both problems. The planks feel stable, the visuals have become genuinely convincing, and the installation systems have improved to the point where a competent DIYer can complete a room in a weekend.
For homeowners in coastal areas like Suffolk County, where humidity swings and moisture exposure are real concerns, the waterproof construction is a practical advantage rather than a marketing claim.
SPC vs WPC: Which Rigid Core Is Right for You
The two dominant rigid-core formats are SPC (stone plastic composite) and WPC (wood plastic composite), and choosing between them matters more than most product listings suggest.
SPC (Stone Plastic Composite) uses a limestone and PVC core. The result is a denser, harder plank that handles heavy foot traffic, temperature fluctuations, and subfloor imperfections better than WPC. SPC is the right call for basements, kitchens, and any space that sees consistent use.
WPC (Wood Plastic Composite) incorporates a foamed core, which makes it slightly softer and warmer underfoot. It's a better fit for bedrooms and living areas where comfort matters more than maximum hardness.
| Feature | SPC Core | WPC Core |
|---|---|---|
| Density | High (harder underfoot) | Lower (softer feel) |
| Temperature resistance | Excellent | Good |
| Subfloor tolerance | Better | Moderate |
| Best for | Kitchens, basements, commercial | Bedrooms, living rooms |
| Typical thickness | 4-6mm | 6-8mm |
The practical takeaway: if you're flooring a mixed-use space and can only pick one, SPC is the safer default.
Understanding Wear Layer and Mil Ratings
The wear layer is the transparent protective coating on top of the design layer, and its thickness is measured in mils (1 mil = 0.001 inch). This number determines how long your floor holds up against scratches, scuffs, and daily wear.
- 6-12 mil: Suitable for low-traffic residential spaces like guest bedrooms
- 12-20 mil: The residential sweet spot for kitchens, living rooms, and hallways
- 20-40 mil: Commercial-grade; appropriate for high-traffic residential use or pet households
A common mistake is buying a floor based on total plank thickness rather than wear layer thickness. A 12mm plank with a 6-mil wear layer will show scratches faster than an 8mm plank with a 20-mil wear layer. Always check the wear layer spec before purchasing.
Waterproof Capabilities, Durability, and Scratch Resistance
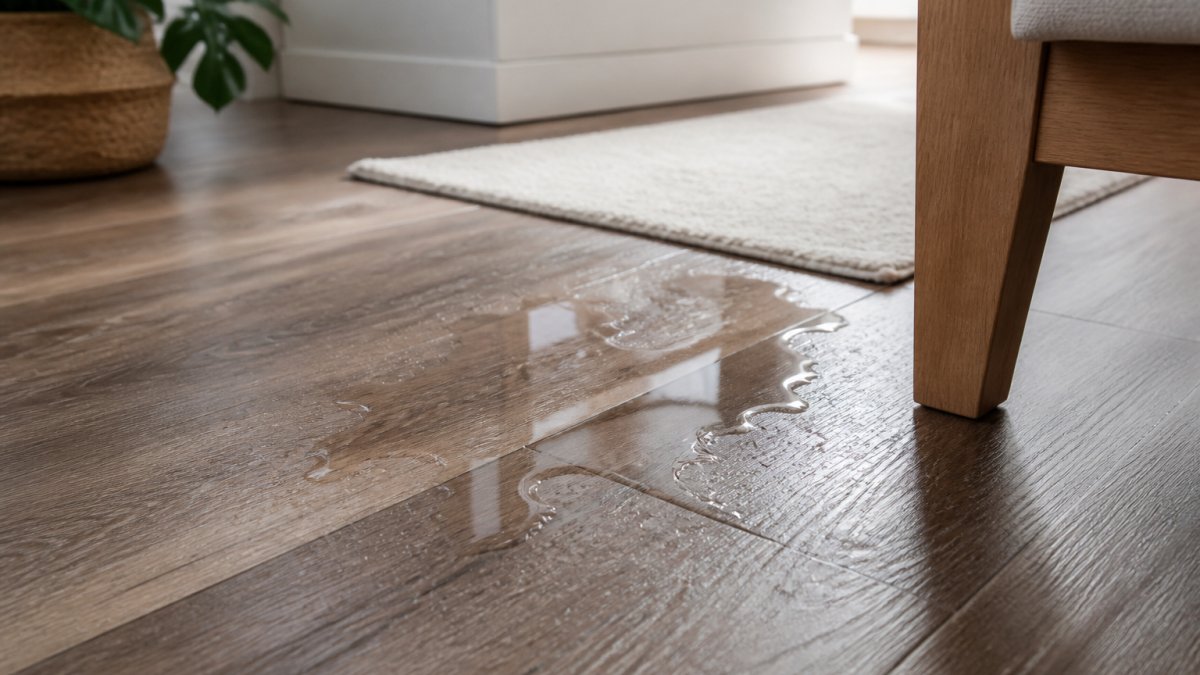
Luxury vinyl plank flooring is 100% waterproof through its core construction, meaning standing water, spills, and moisture vapor will not cause the planks themselves to warp or swell. This is a structural property, not a surface treatment. Unlike laminate, which can buckle when water penetrates the seams, LVP's rigid core is impervious to moisture at the plank level.
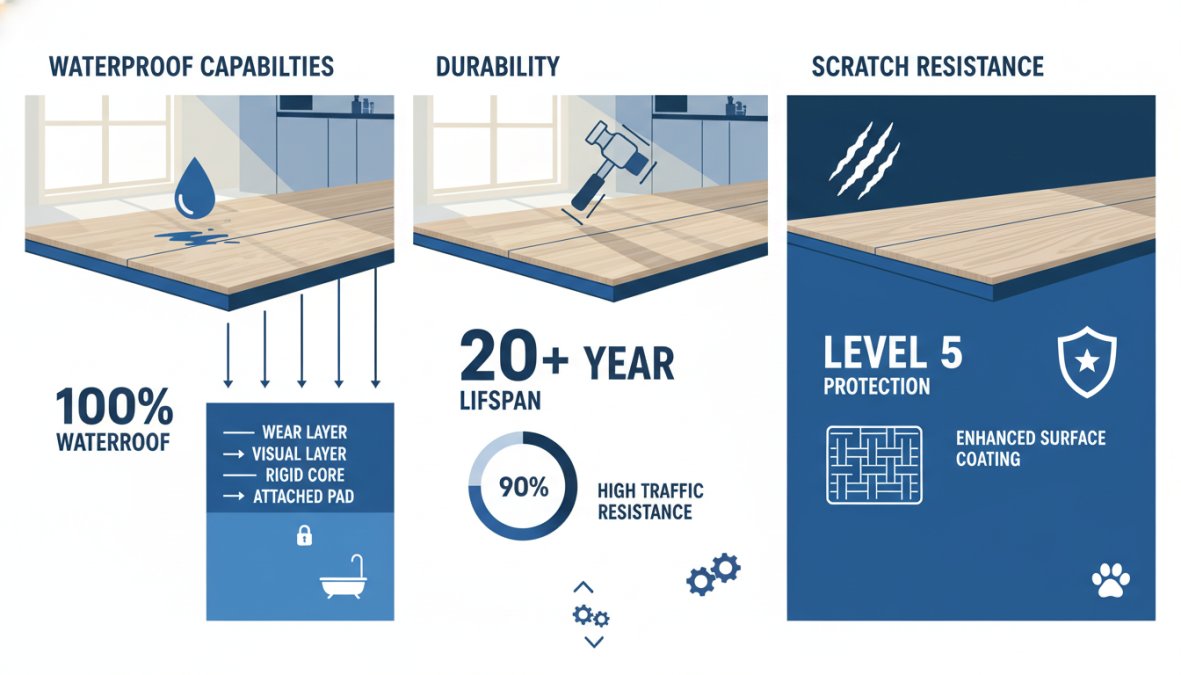
The distinction worth making: waterproof planks do not guarantee a waterproof floor system. Water that seeps through seams and sits on the subfloor can still cause subfloor damage over time. Proper installation, including a moisture barrier where needed, closes that gap.
Scratch resistance is largely a function of wear layer thickness and surface treatment. Floors with embossed-in-register (EIR) texturing, where the embossing aligns with the printed grain pattern, tend to hide minor scratches better than smooth-surface planks because the texture breaks up the visual plane.
According to the Resilient Floor Covering Institute's installation and care guidelines, proper maintenance practices significantly extend the functional life of vinyl plank products, reinforcing that wear layer selection and cleaning habits work together.
Pet-Friendly and High Foot Traffic Performance
Pets are the real stress test for any flooring. Dog nails, wet paws, and accidents all hit the same floor repeatedly. For pet households, the minimum viable wear layer is 20 mil. Anything below that will show claw marks within the first year in a home with medium or large dogs.
Slip resistance is a secondary concern worth checking. Look for products with a coefficient of friction (COF) rating above 0.5 for wet conditions. Many LVP products now include textured surfaces that improve traction without sacrificing the visual appeal of a smooth hardwood look.
For high-traffic commercial or residential spaces, commercial-grade LVP with a 28-40 mil wear layer and a residential warranty of 25+ years is worth the additional cost per square foot.
Luxury Vinyl Plank vs Laminate: Key Differences Explained
The luxury vinyl plank vs laminate comparison is the question we field most often at Hamptons carpet one floor and Home, and the answer is cleaner than most people expect.
Laminate flooring uses a high-density fiberboard (HDF) core with a photographic design layer and a melamine wear surface. It looks similar to LVP and often costs less per square foot. The critical limitation: HDF is wood-based and will swell, warp, and delaminate when exposed to moisture. Laminate is not appropriate for bathrooms, basements, or kitchens with heavy water exposure.
LVP wins decisively on waterproofing, subfloor flexibility, and acoustic performance. Laminate has a slight edge on hardness and can feel more rigid underfoot in some formats.
| Attribute | LVP | Laminate |
|---|---|---|
| Waterproof | Yes (full core) | No (moisture-sensitive) |
| Scratch resistance | Good to excellent (wear layer) | Good (melamine surface) |
| Installation | Floating, click-lock | Floating, click-lock |
| Subfloor tolerance | Better | Moderate |
| Repairability | Individual plank replacement | Difficult |
| Best rooms | All rooms including wet areas | Dry living spaces only |
The one area where laminate holds its own is cost. For dry living spaces like bedrooms and dining rooms where moisture is not a concern, laminate can deliver comparable aesthetics at a lower price point. But for whole-home installations or any room with plumbing, LVP is the more practical choice.
Room-by-Room Recommendations for LVP Flooring
Not every room places the same demands on a floor, and matching the right LVP specification to the right space saves money and prevents premature failure. What most room-by-room guides skip entirely is the subfloor condition each room typically presents, and that omission is why so many DIY installations fail within the first year. The recommendations below pair product specifications with the subfloor reality you're likely to encounter in each space.
Kitchens: Moisture, Traffic, and Subfloor Flatness
Kitchens combine three stressors simultaneously: standing water near the sink and dishwasher, heavy foot traffic, and subfloor transitions where tile or hardwood from an adjacent room creates a height difference at the threshold.
Product spec targets for kitchens:
- Wear layer: 20 mil minimum for households with regular cooking activity
- Core type: SPC preferred for its resistance to temperature swings near ovens and refrigerators
- Surface texture: Embossed-in-register (EIR) or hand-scraped finish to disguise minor scuffs from dropped utensils
- Plank width: 6-9 inches reads as more premium and reduces visible seam lines
Subfloor reality in kitchens: Kitchens frequently have existing ceramic or porcelain tile that homeowners want to float LVP over. This is possible if the tile is fully bonded, grout lines are no deeper than 1/16 inch, and the total height after adding LVP does not create a trip hazard at transitions. Grout lines deeper than 1/16 inch must be filled with floor leveling compound and allowed to cure before installation, skipping this step telegraphs every grout line through the new floor within months.
Around the dishwasher, always install a drip pan and ensure the supply line connection is accessible without pulling up flooring. LVP is waterproof at the plank level, but a slow dishwasher leak that goes undetected for weeks will damage the subfloor beneath regardless of the plank's waterproof rating.
Bathrooms: Seam Sealing Is the Whole Game
Bathrooms are where LVP's waterproof core is most valuable, but they are also where installation details matter most. The planks will not absorb water. The seams between planks, and the gaps at walls and fixtures, are where water finds its way to the subfloor.
Product spec targets for bathrooms:
- Wear layer: 12 mil minimum; 20 mil if the bathroom sees heavy daily use
- Core type: SPC or WPC both work; SPC is preferred in bathrooms with radiant heat
- Plank format: Shorter planks (less than 48 inches) are easier to maneuver around toilets and vanities
Subfloor reality in bathrooms: Bathroom subfloors are the most likely to have soft spots, rot, or previous water damage from old wax ring failures or slow supply line leaks. Before installing a single plank, press firmly across the entire subfloor with your foot and a flat pry bar. Any flex, softness, or spongy feel indicates subfloor damage that must be repaired or replaced before LVP goes down. Installing over a compromised subfloor voids most manufacturer warranties and guarantees the new floor will fail.
At the toilet base, tub surround, and shower threshold, use 100% silicone caulk, not quarter round alone, to seal the gap between the plank edge and the fixture. Quarter round covers the gap visually but does not create a water barrier. Silicone does both.
Basements: Vapor, Temperature, and the Concrete Slab Problem
Basements are the most technically demanding LVP installation environment, and the most commonly botched. The issue is not the plank, it is the concrete slab beneath it.
Product spec targets for basements:
- Core type: SPC exclusively. Basements experience the widest seasonal temperature swings of any room in the home, and SPC's denser limestone-PVC core handles dimensional change better than WPC's foamed core.
- Wear layer: 20 mil minimum. Basements used as living space, home gyms, or playrooms see concentrated foot traffic in a smaller area.
- Pre-attached underlayment: Choose a product with attached underlayment rated for moisture vapor and thermal insulation. Basements are cold, and a thermal break between the slab and the plank improves comfort underfoot significantly.
Subfloor reality in basements: Every concrete slab emits moisture vapor, even slabs that appear and feel completely dry. Moisture vapor transmission (MVT) is measured in pounds per 1,000 square feet per 24 hours. Most LVP manufacturers specify a maximum allowable MVT, commonly 5 to 8 lbs, before a moisture barrier is required. Exceeding this threshold without a barrier causes adhesive failure in glue-down installations and can cause cupping or gapping in floating installations over time.
Test the slab before installing:
- Plastic sheet test (qualitative): Tape a 24x24-inch piece of 6-mil poly to the slab, seal all edges, and leave for 72 hours. Condensation on the underside indicates vapor transmission.
- Calcium chloride test (quantitative): A more precise method that produces a measurable lb/24hr reading. Test kits are available at flooring retailers and home improvement stores.
If vapor transmission exceeds the product's specification, install a 6-mil polyethylene moisture barrier with seams overlapped by 6 inches and taped. In finished basements with existing drywall, also check that the perimeter drainage and sump system are functional before installing any hard surface flooring.
Living Rooms and Open-Plan Spaces: Subfloor Transitions and Visual Scale
Living rooms and open-plan spaces present a different challenge: large square footage with multiple subfloor transitions, existing flooring types, and the visual impact of plank direction and scale.
Product spec targets for living rooms:
- Wear layer: 12-20 mil is appropriate for most residential living rooms; move to 20 mil if you have dogs
- Core type: WPC is acceptable here if comfort underfoot is a priority; SPC if the space connects directly to a kitchen or entryway
- Plank length: Longer planks (48-72 inches) reduce the number of end joints visible in large open spaces and create a more seamless visual
Subfloor reality in living rooms: Open-plan spaces frequently cross multiple subfloor zones, a wood subfloor in the living area transitioning to a concrete slab in a connected sunroom, or a height difference where tile was removed from a dining area. These transitions require floor leveling compound to create a flat, continuous surface before LVP is installed. Floating LVP over an unaddressed height transition will rock, cause click-lock joints to stress and separate, and produce a hollow sound underfoot that worsens over time.
For rooms over 30 feet in any direction, check your product's maximum continuous run specification. Most floating LVP products require a T-molding transition break at intervals specified by the manufacturer, typically every 30-40 linear feet, to allow for thermal expansion. Omitting these breaks in large open-plan spaces is a common cause of buckling in the second or third summer after installation.
Bedrooms: Comfort, Acoustics, and the Underlayment Decision
Bedrooms are the lowest-stress environment for LVP from a moisture and traffic standpoint, which means the decision criteria shift toward comfort underfoot and acoustic performance.
Product spec targets for bedrooms:
- Wear layer: 12 mil is sufficient for most bedrooms
- Core type: WPC is the better choice here, the foamed core is noticeably warmer and softer underfoot than SPC, which matters in a room where you walk barefoot
- Underlayment: If the product does not include pre-attached underlayment, add a 2-3mm foam or cork underlayment for thermal comfort and minor sound dampening
Subfloor reality in bedrooms: Bedrooms on upper floors typically have wood subfloors with the most common issue being squeaks from loose subfloor panels. Walk the entire subfloor before installing and drive screws through any panel that moves or squeaks. A squeaky subfloor under LVP is louder than the same squeak under carpet, and it cannot be fixed without pulling up the floor.
Installing LVP Flooring DIY: What You Need to Know
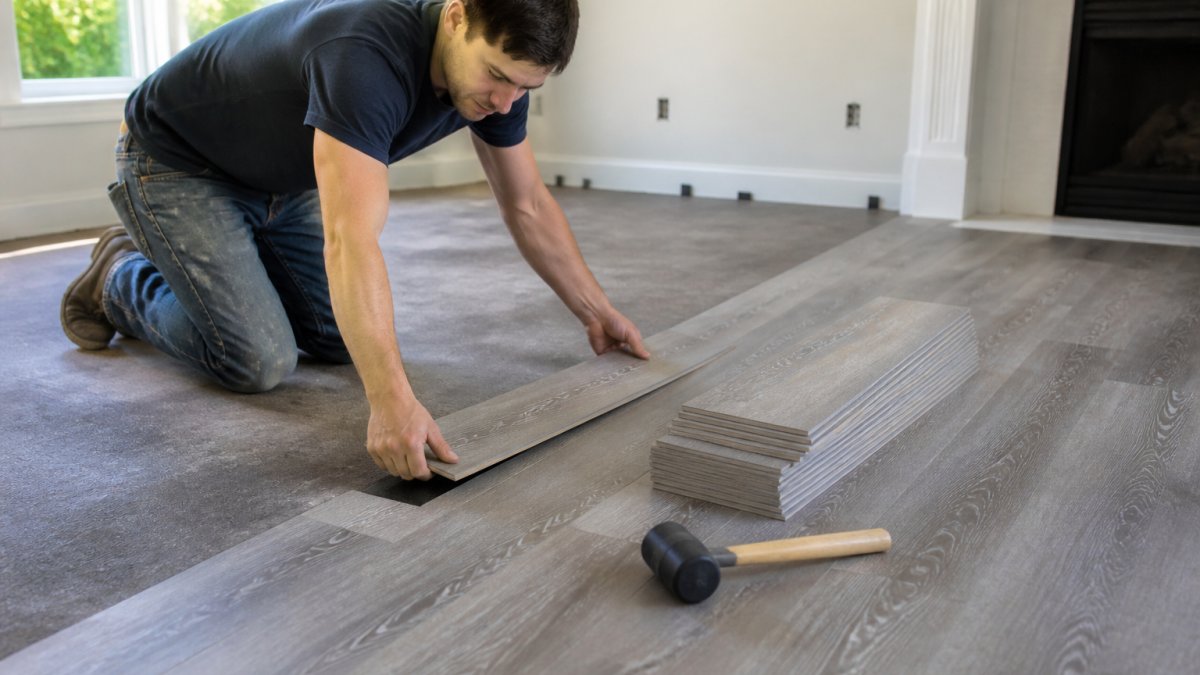
DIY LVP installation is genuinely achievable for most homeowners. The click-lock installation system used by most modern LVP products requires no adhesive, no nails, and no specialized tools beyond what a basic installation kit provides.
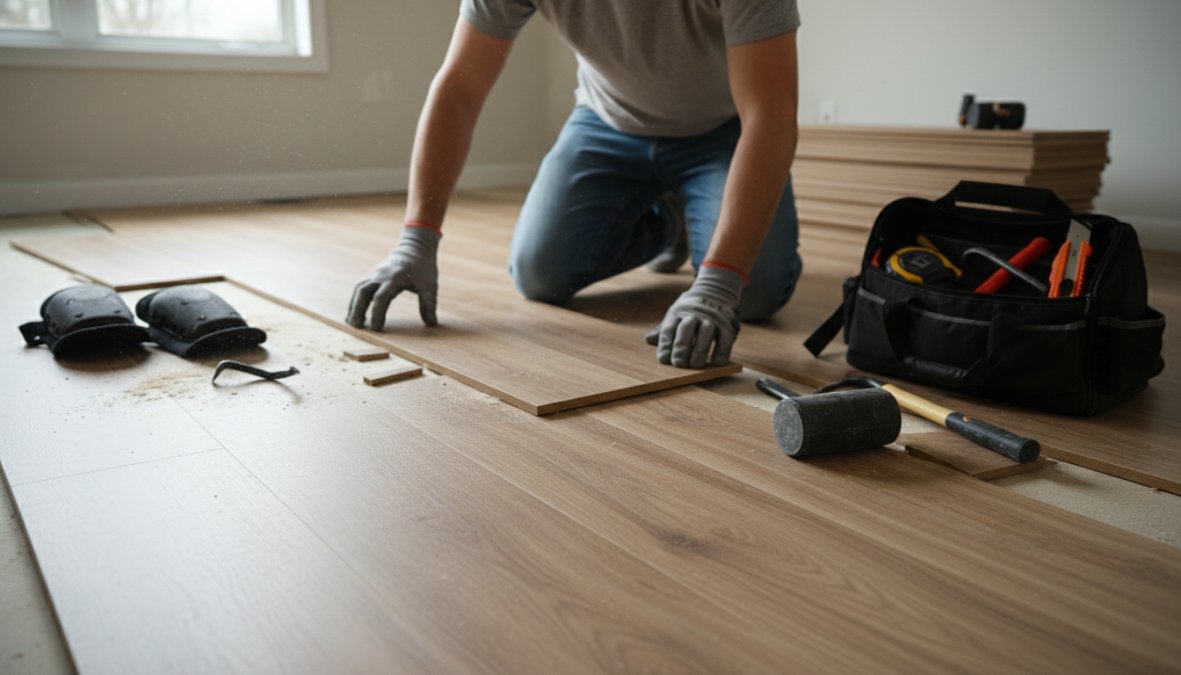
A standard installation kit includes a tapping block, pull bar, spacers, and a utility knife or jigsaw. Budget roughly one full day for a 200-300 square foot room if you're working alone and it's your first installation.
The thing nobody tells you about LVP installation is that the prep work takes longer than the actual floor laying. Subfloor preparation consistently accounts for half the total project time and almost all the problems that show up after installation.
Subfloor Preparation Requirements
The subfloor is the make-or-break variable in any LVP installation. Most manufacturers require the subfloor to be flat within 3/16 inch over a 10-foot span. That's a tighter tolerance than it sounds.
Common subfloor issues and their fixes:
- High spots: Grind down with a belt sander or angle grinder
- Low spots/dips: Fill with floor leveling compound and allow to cure fully before installing
- Squeaks: Secure loose subfloor panels with screws before laying LVP
- Existing vinyl or tile: LVP can float over most existing hard surfaces if they are flat and firmly bonded
According to the National Wood Flooring Association's subfloor preparation standards, subfloor flatness is the single most common cause of post-installation failure across all floating floor systems. Getting this step right eliminates the majority of warranty claims.
Click-Lock Installation and Acclimation Tips
Most LVP products require acclimation before installation. The standard recommendation is 48 hours in the installation environment, with the boxes laid flat and the room at its normal operating temperature. This allows the planks to adjust to the ambient temperature and humidity before they're locked together.
Acclimation matters more for WPC than SPC due to the foamed core's slightly higher thermal expansion rate. SPC is more dimensionally stable, but following the manufacturer's acclimation guidelines protects your warranty either way.
Installation sequence tips:
- Run planks parallel to the longest wall or primary light source for the most natural appearance
- Stagger end joints by at least 6 inches between rows (12 inches is better)
- Maintain a 1/4-inch expansion gap at all walls, door frames, and fixed objects
- Install transition strips at doorways and where LVP meets other flooring types
- Add baseboard or quarter round to cover expansion gaps at walls
LVP Flooring Installation Cost and Pricing Breakdown
LVP flooring installation cost varies based on product quality, room complexity, subfloor condition, and whether you hire a professional or handle it yourself. The most common budgeting mistake is treating the material cost as the total project cost. A complete, accurate budget has four distinct line items, and underestimating any one of them is how projects run over.
Line Item 1: Material Cost (The Planks)
LVP product pricing is primarily driven by wear layer thickness, core type, and brand tier. The market breaks into three practical tiers:
Entry-level LVP (6-12 mil wear layer) Typically the thinnest planks in the 4-6mm total thickness range. Appropriate for low-traffic spaces like guest bedrooms or a home office used a few hours a day. The visual quality at this tier has improved significantly, but the wear layer will show scratches faster in active households.
Mid-range LVP (12-20 mil wear layer) The most common residential choice, typically in the 6-8mm total thickness range. This tier covers the majority of whole-home installations, kitchens, living rooms, hallways, and bathrooms. Most products at this tier include pre-attached underlayment, which reduces additional material costs.
Premium and commercial-grade LVP (20-40 mil wear layer) Thicker planks, often 8-12mm total, with longer warranty periods and more realistic visual layers. Appropriate for pet households, high-traffic entryways, or any space where the floor needs to perform for 20-plus years without refinishing. Some products at this tier carry lifetime residential warranties.
Line Item 2: Additional Materials
The plank cost is only part of the material budget. A complete material list for a standard LVP installation includes:
- Underlayment: If your chosen product does not include pre-attached underlayment, budget for a separate underlayment layer. Foam underlayment is the most common and least expensive option. Cork underlayment costs more but provides better acoustic performance and a more natural feel underfoot. For below-grade installations, a vapor-barrier underlayment is required regardless of what the plank itself includes.
- Moisture barrier: For basement and below-grade installations, a 6-mil polyethylene sheet is a separate cost from underlayment. Do not skip this line item for concrete slab installations.
- Transition strips: T-moldings, reducers, and end caps are required wherever LVP meets a different flooring type or terminates at a threshold. Budget one transition strip per doorway plus any room-to-room transitions. These are often sold by the linear foot or as individual pieces.
- Quarter round or baseboard: Used to cover the expansion gap at walls. If you are replacing existing baseboard, budget for new material and the labor to install it.
- Floor leveling compound: Required if the subfloor has dips, humps, or height transitions that exceed the manufacturer's flatness tolerance (typically 3/16 inch over 10 feet). This is a variable cost that depends entirely on subfloor condition and is frequently overlooked in initial budgets.
- Overage factor: Order 10% more material than your calculated square footage for standard rectangular rooms. For rooms with diagonal layouts, multiple angles, or irregular shapes, use a 15% overage buffer. Dye lots change between production runs, and matching planks ordered six months after the original purchase is not guaranteed.
Line Item 3: Subfloor Preparation
Subfloor preparation is the most variable and most underestimated cost in any LVP project. It is also the line item most frequently omitted from online cost estimates, because it depends entirely on what you find when you pull up the existing floor.
Common subfloor preparation costs to anticipate:
- Grinding high spots: Concrete slabs with high spots require grinding with an angle grinder or belt sander. This is a DIY-achievable task but time-consuming.
- Leveling compound: Bags of self-leveling compound cover a fixed area at a specified depth. Deep low spots require more material and multiple pours with curing time between them.
- Subfloor panel replacement: Wood subfloor panels with rot, soft spots, or significant damage must be replaced before LVP is installed. This is a structural repair, not a cosmetic one, and it adds both material and labor cost.
- Existing floor removal: If you are installing over existing flooring that must come up, glue-down tile, staple-down carpet with pad, or old sheet vinyl, removal labor is a separate cost from installation labor. Glue-down tile removal is particularly labor-intensive and may require additional subfloor prep after the tile is removed.
Line Item 4: Installation Labor (Professional vs. DIY)
Professional installation labor for LVP is typically quoted per square foot, with the final number influenced by room complexity, number of cuts required, stair work, and whether subfloor prep is included in the quote or billed separately.
Factors that increase labor cost above a base rate:
- Stairs (each step requires individual cuts and nosing installation)
- Rooms with many angles, alcoves, or irregular shapes
- Removal and disposal of existing flooring
- Subfloor preparation work billed at an hourly rate
- Furniture moving if not handled by the homeowner beforehand
DIY installation eliminates labor cost entirely on the installation itself but does not eliminate subfloor prep costs. A realistic DIY timeline for a first-time installer is one full day for a 200-300 square foot room, with the majority of that time spent on subfloor prep, acclimation staging, and cuts rather than the actual plank-laying. Rooms with multiple doorways, angles, or transitions take proportionally longer.
For DIY projects, the tools required are minimal: a tapping block, pull bar, spacers, a utility knife or jigsaw, a tape measure, and a chalk line. Most flooring retailers rent or sell installation kits that include all of these.
Professional installation adds labor cost but provides a workmanship warranty, handles subfloor prep as part of the scope, and is the right choice for large whole-home projects, complex layouts, or any installation where subfloor conditions are uncertain. Always request a written quote that itemizes material, subfloor prep, installation, and transition work as separate line items, a single lump-sum quote makes it impossible to understand where cost overruns originate.
Total Project Cost: Putting It Together
A realistic whole-project budget should account for all four line items before any material is purchased. The most common pattern among homeowners who go over budget is purchasing materials first based on a per-square-foot product price, then discovering subfloor prep and transition costs that were not anticipated.
As a general framework for budget planning:
- Measure your square footage accurately, then add your overage factor
- Get a subfloor assessment before finalizing your product choice, subfloor prep needs may shift your budget allocation
- Price all additional materials (underlayment, transitions, quarter round, moisture barrier) as a separate line from the plank cost
- If hiring a professional, request an itemized quote and confirm whether subfloor prep is included
- Build a contingency into your total budget for subfloor surprises, this is the line item most likely to vary from initial estimates
Hamptons Carpet One Floor and Home provides free in-home measurements and subfloor assessments for Suffolk County homeowners, which takes the guesswork out of steps one and two before you commit to a product or a budget.
How to Clean Luxury Vinyl Plank Flooring and Keep It Looking New
How to clean luxury vinyl plank flooring properly is simpler than most flooring types, but a few specific habits make a significant difference in long-term appearance.
Daily and weekly maintenance:
- Sweep or vacuum with a soft-bristle attachment to remove grit before it acts as an abrasive
- Damp mop with a pH-neutral cleaner specifically formulated for vinyl flooring
- Wipe spills immediately, particularly acidic liquids like wine or citrus juice
What to avoid:
- Steam mops: the heat and moisture can damage the wear layer and loosen adhesive in glue-down installations
- Abrasive scrubbers or steel wool
- Oil-based soaps or wax-based cleaners, which leave residue that attracts dirt
- Ammonia or bleach-based cleaners at full concentration
For scuffs and marks that don't respond to regular cleaning, a small amount of rubbing alcohol on a soft cloth typically removes them without damaging the wear layer. Test in an inconspicuous area first.
According to the Vinyl Flooring Manufacturers Association's care and maintenance guide, using the wrong cleaning products is the leading cause of premature wear layer degradation in residential LVP installations.
What Most Guides Don't Tell You About LVP
This is the section most buying guides skip because it doesn't sell product. It matters anyway.
Acoustic Performance: STC and IIC Ratings
LVP is harder than carpet and generates more impact noise transmission to the floor below. In multi-story homes or condominiums, this is a real consideration, not a theoretical one.
Two ratings govern acoustic performance:
- STC (Sound Transmission Class): Measures airborne sound reduction (voices, TV, music)
- IIC (Impact Isolation Class): Measures impact noise reduction (footsteps, dropped objects)
Most building codes and condo associations require a minimum IIC rating of 50 for hard surface flooring. Many standard LVP installations without added underlayment fall below this threshold.
The fix is straightforward: use a thicker acoustic underlayment (3-5mm) or choose LVP with a pre-attached underlayment rated for sound control. Some premium products include attached underlayment with IIC ratings above 60, which handles most residential requirements without additional materials.
Environmental Impact, VOC Emissions, and Long-Term Repairability
LVP is a PVC-based product, and VOC emissions are a legitimate concern for homeowners with sensitivities or young children. The standard to look for is FloorScore certification, which indicates the product has been tested for VOC emissions and meets indoor air quality standards.
Many LVP products now carry GREENGUARD Gold certification, a more stringent standard that qualifies products for use in schools and healthcare facilities. If indoor air quality is a priority, ask specifically for the product's certification documentation rather than accepting general "low VOC" marketing language.
On repairability, LVP has a genuine advantage over glue-down hardwood or tile. Individual planks in a floating floor installation can be replaced without disturbing the entire floor, provided you have matching planks in reserve. This is why buying an extra carton and storing it is standard advice from every experienced installer. Dye lots change, and a floor installed in 2026 may not have a matching product available in 2031.
The environmental footprint of LVP is more complex than a single certification can capture. PVC production is energy-intensive, and most LVP is not recyclable through standard municipal programs. Some manufacturers have take-back programs. If environmental impact is a priority, ask your retailer about end-of-life options before purchasing.
Selecting the right floor for your home involves more variables than most product pages acknowledge, from subfloor conditions and acoustic requirements to VOC certifications and long-term repairability. Hamptons carpet one floor and Home serves all of Suffolk County as a floor covering retailer with the product knowledge and local expertise to match the right LVP specification to your specific space. Visit us to discuss your project, get accurate square footage estimates, and see current LVP options in person before committing to a purchase.
Frequently Asked Questions
Is luxury vinyl plank flooring truly waterproof?
Yes, luxury vinyl plank flooring is 100% waterproof at the plank level, making it one of the most water-resistant hard-surface options available. The rigid core construction (SPC or WPC) will not swell, warp, or buckle when exposed to standing water. However, it's worth noting that subfloor moisture can still be an issue if a proper moisture barrier is not installed, particularly in basements or below-grade spaces. Always address subfloor conditions before installation.
What is the difference between LVP and laminate flooring?
The key difference between luxury vinyl plank vs laminate is how they handle moisture. LVP is made from PVC-based vinyl and is fully waterproof, while laminate has an HDF wood core that can swell and warp when wet. LVP also tends to be softer underfoot and quieter. Laminate often offers a more realistic wood feel and slightly better scratch resistance at higher price points, but LVP wins in kitchens, bathrooms, and basements where moisture exposure is likely.
How much does LVP flooring installation cost?
LVP flooring installation cost varies based on material quality, room size, and whether you hire a professional or go the DIY route. Material costs generally range from budget-friendly entry-level options to premium commercial-grade planks at higher price points. Professional installation adds labor on top of materials. DIY installation using a click-lock floating floor system can significantly reduce total cost. Always calculate your square footage carefully, add 10% overage, and account for underlayment, transition strips, and quarter round.
How do you clean luxury vinyl plank flooring without damaging it?
To clean luxury vinyl plank flooring, sweep or vacuum regularly to remove grit that can scratch the wear layer. Damp-mop with a pH-neutral cleaner, avoid steam mops, abrasive scrubbers, or wax-based products, which can degrade the surface over time. For stains, a soft cloth with a mild cleaner works well. The stain resistance of LVP makes routine cleaning straightforward, but harsh chemicals should always be avoided to protect the finish and residential warranty.
Can you install luxury vinyl plank flooring over existing tile?
In many cases, yes, LVP can be installed over existing tile as a floating floor, provided the tile surface is flat, firmly adhered, and free of significant height variations. Subfloor preparation is critical: any high spots or lippage greater than 3/16 inch over 10 feet should be addressed with floor leveling compound. Grout lines that are too deep may also need to be filled. Always check the manufacturer's installation guidelines, as requirements vary by product and plank thickness.
How long does luxury vinyl plank flooring last?
With proper care, luxury vinyl plank flooring can last 15 to 25 years or more in residential settings. Longevity depends heavily on the wear layer thickness, measured in mils, with thicker wear layers (12 mil and above) offering better scratch and scuff resistance for high foot traffic areas. Most quality LVP products come with residential warranties ranging from 15 years to lifetime coverage. Commercial-grade options with higher mil ratings are designed for even heavier use.
This article was written using GrandRanker