 How-to
Remove Sand From Hardwood Floor Gaps: A Complete Guide
Table of Contents
- Why Sand in Hardwood Floor Gaps Matters
- Preparation and Vacuuming Techniques for Sand Removal
- Best Vacuum for Hardwood Floor Gaps
- Tools and Techniques for Cleaning Between Floorboards
- Safe Cleaning Solutions and What to Avoid
- Hardwood Floor Gap Filler: When and How to Use It
- Preventing Grit Buildup on Wood Floors
- Deep Cleaning Versus Routine Maintenance
Last Updated: August 28, 2026
Why Sand in Hardwood Floor Gaps Matters
Sand trapped between hardwood floor planks grinds abrasive material directly into your wood finish. A 125-pound woman wearing high heels exerts 2,000 pounds per square inch of pressure on a hardwood floor, according to the International Floor Covering Institute. That concentrated force drives sand deeper into gaps and across the finish surface, creating microscopic scratches that dull polyurethane and accelerate wear.
At Hamptons carpet one floor and Home, we've helped coastal homeowners understand why removing sand from hardwood floor gaps is essential maintenance. Beach properties face relentless sand intrusion, and the longer sand sits in your gaps, the more damage accumulates. Sand acts like sandpaper every time someone walks across it. Regular removal prevents finish degradation, preserves the wood's natural appearance, and extends the time between refinishing cycles. This guide covers the exact techniques, tools, and maintenance routines that actually work.
Preparation and Vacuuming Techniques for Sand Removal
Before reaching for specialized tools, proper preparation saves time and prevents spreading sand across clean areas.
How to identify visible sand and debris buildup
Sand appears as fine, light-colored particles concentrated along floor edges, in corners, and between planks. You'll notice it most in entryways, near sliding glass doors, and in high-traffic zones. A gritty texture when you run your hand along the floor signals loose particles ready to damage the finish with the next footstep.
Coastal properties accumulate coarser sand; inland homes collect finer dust and pet hair. If you see a thin layer of particles along the gaps, that's debris buildup actively working against your floor finish.
Vacuuming technique for hardwood floors
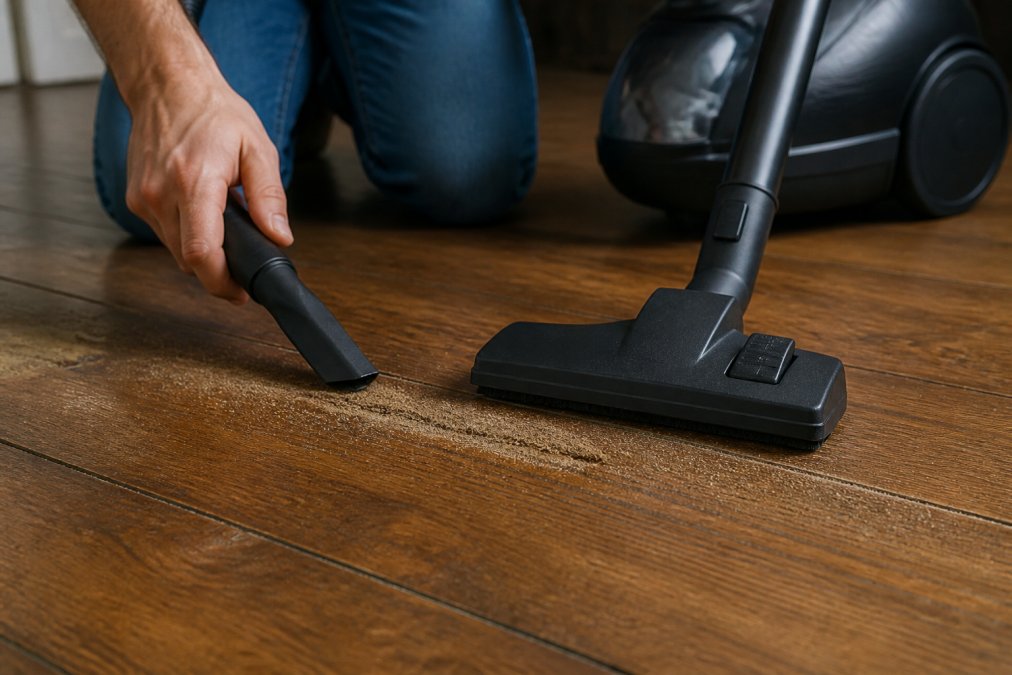
Start with a hard-floor vacuum set to its hard-floor setting; never use the beater bar, which can scratch the finish and drive particles deeper into gaps. Move slowly across the floor in the direction of the wood grain. For sand concentrated in gaps, use the crevice tool attachment and work methodically along each seam. After vacuuming, follow with a microfiber mop slightly dampened with water to pick up any remaining fine particles.
Best Vacuum for Hardwood Floor Gaps
Not all vacuums handle hardwood effectively. The wrong model can scratch your finish or fail to extract particles from tight gaps.
Wet/dry vacuum with narrow attachments
A wet/dry vacuum with a narrow attachment is the gold standard for removing sand from hardwood floor gaps. These models provide serious suction power without the beater bar that damages wood finishes. The narrow crevice tool reaches deep into gaps where sand hides. Set the suction to its highest setting and work slowly along each gap for noticeably better results than standard vacuums.
Hard-floor vacuums versus standard models
Hard-floor vacuums are engineered specifically for wood surfaces, eliminating the beater bar entirely and using softer brush rolls designed not to scratch. They're quieter and more maneuverable than wet/dry models, making them ideal for daily and weekly maintenance.
Standard household vacuums often retain the beater bar as an option. If you own a standard vacuum, verify it has a true hard-floor mode that deactivates the brush roll completely. For coastal homes and high-traffic properties, invest in a dedicated hard-floor vacuum.
Tools and Techniques for Cleaning Between Floorboards
Once vacuuming is complete, targeted tools address sand trapped too deep for suction alone.
Soft-bristle broom and microfiber mop methods
A soft-bristle broom is your first line of defense for daily sand removal. Sweep gently along the wood grain in short strokes, working sand toward open spaces where you can vacuum it up. A microfiber mop picks up what the broom and vacuum leave behind. Dampen it lightly, never wet, and work along the gaps. Microfiber's electrostatic charge attracts fine particles without requiring chemicals. Do this weekly in high-traffic areas, bi-weekly elsewhere.
Crevice tool attachments and fine-bristle brushes
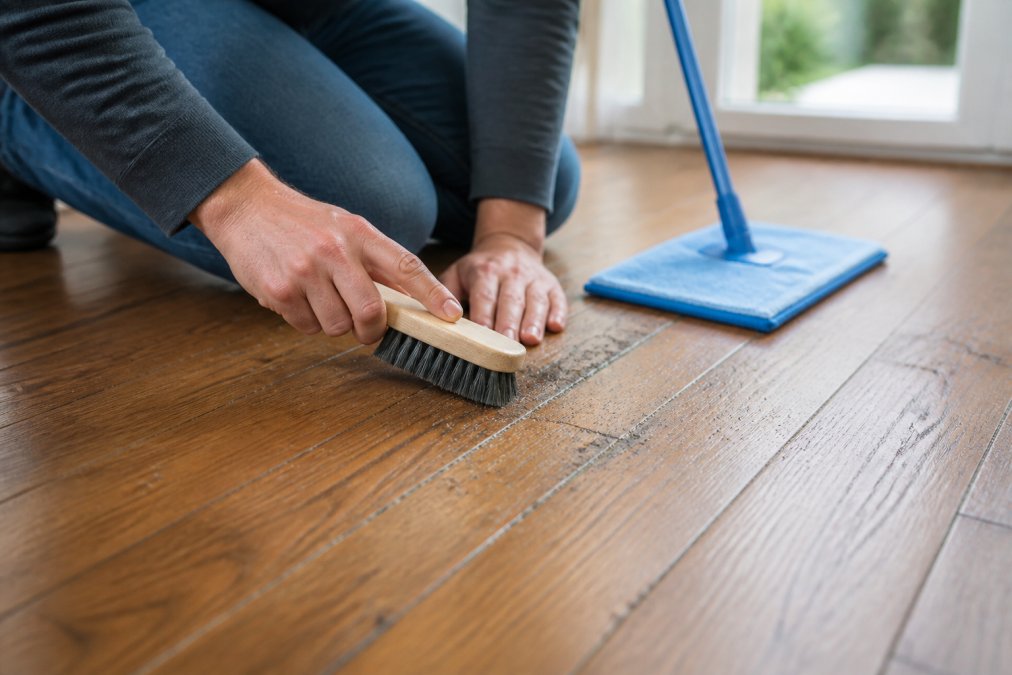
A crevice tool attachment on your vacuum reaches gaps that standard nozzles can't access. Position it flat against the gap and move slowly. For narrower gaps, a soft-bristle toothbrush works well. Dip it lightly in a mild soap solution (one part pH-neutral hardwood cleaner to ten parts warm water), gently scrub the gap, then immediately wipe with a damp microfiber cloth. After this step, sprinkling table salt in the gap can help absorb any remaining moisture before it damages the wood.
Compressed air for hard-to-reach areas
Compressed air blows sand out of extremely tight gaps and corners where brushes can't reach. Use short bursts at low pressure; high pressure scatters sand across your floor. Compressed air works best as a final step after vacuuming and brushing. After using compressed air, vacuum immediately to capture the dislodged particles.
Safe Cleaning Solutions and What to Avoid
The wrong cleaner damages your polyurethane finish faster than sand does.
pH-neutral cleaners for wood floor finish protection
pH-neutral hardwood floor cleaners are specifically formulated to clean without stripping polyurethane. Mix according to manufacturer's instructions, usually one part cleaner to ten parts water. Apply it to a microfiber mop, wring thoroughly so the mop is barely damp, then work along the floor. Never apply cleaner directly to the floor; always apply it to the mop first to prevent excess moisture from seeping into gaps.
Why vinegar and harsh chemicals damage polyurethane
Vinegar is acidic enough to strip hardwood finishes over time, according to SVB Wood Floors maintenance guidance. Harsh chemicals, bleach, ammonia, and steam cleaners cause similar damage. Steam drives moisture into gaps, causing wood to swell and cup. Bleach strips color and finish simultaneously. Ammonia leaves residue that attracts dirt and dulls shine.
Stick to pH-neutral cleaners or plain water on a barely-damp microfiber mop. It's slower than chemical solutions, but it preserves your finish for years longer.
Hardwood Floor Gap Filler: When and How to Use It
Gaps in hardwood floors are normal and expected. The question of whether to fill them divides experts for good reason.
Understanding seasonal gaps and wood expansion
Wood floors expand when humidity increases and contract when humidity decreases. Winter heating lowers indoor humidity, causing wood to shrink and gaps to widen. Summer humidity reverses the process. Maintaining indoor humidity between 35% and 55% year-round minimizes seasonal gaps. This single step reduces gap size more effectively than any filler.
Why experts caution against permanent filling
Filling gaps permanently creates problems that outweigh the cosmetic benefit. Wood filler dries hard and brittle. When humidity rises, the wood around the filler expands while the filler cannot, creating pressure that either cracks the filler or forces it out of the gap entirely. Expert Hardwood Flooring advises against permanent filling because over time, the wood will expand and push filler out.
The better approach: accept seasonal gaps as normal, maintain stable humidity, and focus on keeping gaps clean. If gaps bother you aesthetically, temporary cork or foam backer rod can be removed and replaced seasonally without damaging the wood.
Preventing Grit Buildup on Wood Floors
Routine maintenance prevents sand accumulation far more effectively than aggressive cleaning after the fact.
Daily and weekly maintenance routines
Daily: Sweep or dust-mop entryways and high-traffic zones where sand concentrates. This takes five minutes and prevents particles from spreading across your entire floor.
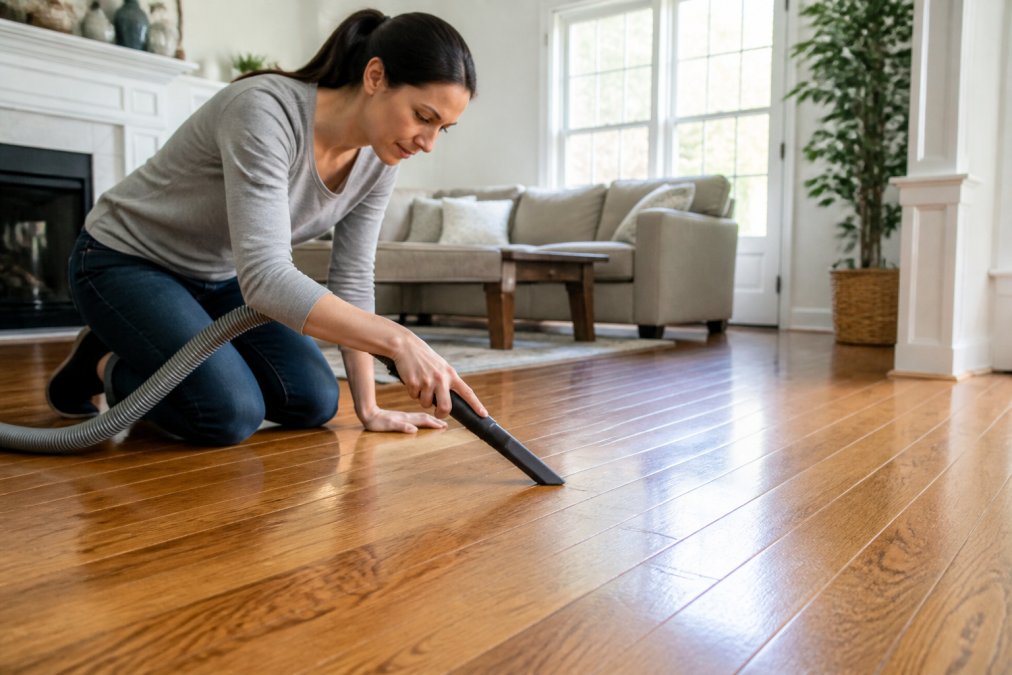
Weekly: Vacuum your entire hardwood floor using the hard-floor setting, working along the wood grain. Pay extra attention to gaps and corners. Follow with a barely-damp microfiber mop if needed.
Monthly: Deep-clean gaps using soft-bristle brush, mild soap solution, and compressed air if necessary.
Managing sand in coastal and high-traffic homes
Coastal properties need more aggressive prevention. Sand tracked in daily means daily sweeping, not weekly. Consider a high-quality doormat outside and inside each exterior door. If you're installing new hardwood in a coastal home, certain wood cut choices may reduce gap size and sand intrusion compared to standard options.
Deep Cleaning Versus Routine Maintenance
Routine maintenance, daily sweeping, weekly vacuuming, monthly gap cleaning, keeps sand levels manageable and finish intact. This is your baseline.
Deep cleaning becomes necessary after construction, sanding projects, or seasonal sand intrusion so severe that routine methods can't keep up. It involves the wet/dry vacuum, soft-bristle brushes with mild soap solution, and potentially compressed air. Deep cleaning is occasional, not routine. If you're deep-cleaning every week, your routine maintenance isn't working.
When sand levels are manageable, stick to routine maintenance. When you see visible accumulation in gaps or notice finish dulling in high-traffic areas, that's your signal to deep-clean. After deep cleaning, return to routine maintenance to prevent the problem from recurring.
Sand in hardwood floor gaps is a solvable problem with the right approach. Most homeowners can manage it with daily sweeping, weekly vacuuming, and monthly targeted gap cleaning. The key is consistency; small efforts prevent the large damage that comes from ignoring sand accumulation.
If you're struggling with sand intrusion in a coastal home or dealing with hardwood installed over a challenging subfloor, Hamptons carpet one floor and Home can help. Our team understands the specific challenges of Suffolk County properties: salt air, sand traffic, humidity swings, and older construction. We provide expert guidance on floor selection, installation, and maintenance tailored to your environment. Contact us for a consultation and learn how to protect your hardwood investment for decades.
| Maintenance Task | Frequency | Tools Needed | Expected Time |
|---|---|---|---|
| Sweep entryways | Daily | Soft-bristle broom | 5 minutes |
| Vacuum hardwood floors | Weekly | Hard-floor vacuum | 15-20 minutes |
| Gap cleaning with brush and soap | Monthly | Soft-bristle brush, pH-neutral cleaner, microfiber cloth | 20-30 minutes |
| Deep cleaning with wet/dry vacuum | As needed (seasonal or post-construction) | Wet/dry vacuum, crevice tool, compressed air | 45-60 minutes |
| Humidity monitoring and adjustment | Year-round | Humidifier/dehumidifier | Ongoing |
=== FAQ ANSWERS (audit these too, same rules) ===
[1] Q: How do I get sand out of deep floor cracks without damaging the finish? A: Start by lifting visible sand with a soft-bristle broom or microfiber dust mop, working with the wood grain. For embedded debris, use a hard-floor vacuum with a crevice tool attachment, the suction power removes sand without grinding it into the polyurethane finish. Avoid dragging footwear or furniture across loose sand, as this grinds particles into the surface. For stubborn grit in tight gaps, a soft-bristle toothbrush with a mild pH-neutral cleaner and warm water works safely. Always dry immediately to prevent moisture damage to the wood.
[2] Q: What's the best vacuum for hardwood floor gaps? A: A wet/dry vacuum with a narrow crevice attachment offers superior suction power for extracting sand from gaps without scratching the finish. Hard-floor vacuums specifically designed for wood are preferable to standard carpet models, which often have beater bars that can damage planks. Look for models with adjustable suction settings and soft-bristle attachments. Avoid older vacuums with rigid plastic crevice tools, these can scrape the polyurethane coating. For regular maintenance, a microfiber dust mop or fine-bristle broom works well for surface sand removal.
[3] Q: Should I fill the gaps in my hardwood floor? A: Experts generally advise against permanent gap filling. Hardwood naturally expands and contracts with seasonal humidity changes, wood expands when humidity increases and contracts in winter when heating reduces humidity levels. If you fill gaps with wood filler, expanding boards can buckle the filler or damage adjacent planks. Filler also dries brittle and cracks under wood movement. Instead, focus on maintaining indoor humidity between 35% and 55% year-round to minimize gap formation, and use preventative cleaning to keep sand from accumulating in existing gaps.
[4] Q: How often should I remove sand from my hardwood floors? A: Most households should remove dust, pet hair, and grit from hardwood floors on a daily to bi-weekly basis, depending on foot traffic and sand exposure. In coastal or high-traffic homes, daily sweeping or dust mopping prevents sand from being ground into the finish. Weekly vacuuming with a hard-floor setting captures embedded debris before it causes scratches. Deep cleaning of gaps should occur monthly or seasonally, depending on how much sand accumulates. Regular preventative care is far more effective than reactive deep cleaning.
Frequently Asked Questions
Q: How do I get sand out of deep floor cracks without damaging the finish?
A: Start by lifting visible sand with a soft-bristle broom or microfiber dust mop, working with the wood grain. For embedded debris, use a hard-floor vacuum with a crevice tool attachment, the suction power removes sand without grinding it into the polyurethane finish. Avoid dragging footwear or furniture across loose sand, as this grinds particles into the surface. For stubborn grit in tight gaps, a soft-bristle toothbrush with a mild pH-neutral cleaner and warm water works safely. Always dry immediately to prevent moisture damage to the wood.
Q: What's the best vacuum for hardwood floor gaps?
A: A wet/dry vacuum with a narrow crevice attachment offers superior suction power for extracting sand from gaps without scratching the finish. Hard-floor vacuums specifically designed for wood are preferable to standard carpet models, which often have beater bars that can damage planks. Look for models with adjustable suction settings and soft-bristle attachments. Avoid older vacuums with rigid plastic crevice tools, these can scrape the polyurethane coating. For regular maintenance, a microfiber dust mop or fine-bristle broom works well for surface sand removal.
Q: Should I fill the gaps in my hardwood floor?
A: Experts generally advise against permanent gap filling. Hardwood naturally expands and contracts with seasonal humidity changes, wood expands when humidity increases and contracts in winter when heating reduces humidity levels. If you fill gaps with wood filler, expanding boards can buckle the filler or damage adjacent planks. Filler also dries brittle and cracks under wood movement. Instead, focus on maintaining indoor humidity between 35% and 55% year-round to minimize gap formation, and use preventative cleaning to keep sand from accumulating in existing gaps.
Q: How often should I remove sand from my hardwood floors?
A: Most households should remove dust, pet hair, and grit from hardwood floors on a daily to bi-weekly basis, depending on foot traffic and sand exposure. In coastal or high-traffic homes, daily sweeping or dust mopping prevents sand from being ground into the finish. Weekly vacuuming with a hard-floor setting captures embedded debris before it causes scratches. Deep cleaning of gaps should occur monthly or seasonally, depending on how much sand accumulates. Regular preventative care is far more effective than reactive deep cleaning.
This article was written using GrandRanker