 How-to
Why Flooring Samples Look Different at Home
Table of Contents
- Why Flooring Samples Look Different at Home: The Core Reasons
- The 12-Inch Sample Problem: Wood Grain and Batch Variation
- How Wall Paint and Room Decor Shift Floor Color
- Metamerism: Why Two Lights Show Two Different Colors
- The 24-Hour Rule: How to Test Flooring Samples at Home
- How to Choose Flooring Color That Works in Every Room
- Finding the Best Flooring for Living Room Light Conditions
- Conclusion: Trust Your Eyes, Not Just the Sample
- Frequently Asked Questions
Last Updated: September 6, 2026
Why Flooring Samples Look Different at Home: The Core Reasons
The difference between a flooring sample in a showroom and the same flooring in your living room often feels like a completely different product. This color shift is rarely a defect; it is the result of physics, environment, and perception. We walk Suffolk County homeowners through this confusion every week, and the explanation usually comes down to light and context.
The single biggest culprit is the lighting environment. Showrooms use bright, uniform overhead lighting designed to make colors pop, while your home relies on a mix of windows, lamps, and shadows. Because flooring is highly reactive to light, the same plank can appear dramatically different under cool LEDs versus warm incandescent bulbs or the specific orientation of natural light through a north-facing window Floor King's guide on why samples fail at home.
Natural Light vs. Showroom Lighting
Natural light is not constant. It changes with the time of day, the season, and the weather. Morning sun casts a cool, blue-toned light, while late afternoon sun is warm and golden. A floor that looks like light oak at noon can appear rich and amber by evening.
Showroom lighting, by contrast, is often a mix of fluorescent and halogen fixtures designed for maximum color accuracy and appeal. This controlled environment masks the subtle shifts that natural light reveals. The result is that a color you loved under bright showroom lights suddenly looks flat, dark, or overly yellow in your own hallway.
Artificial Lighting and Color Temperature
Artificial lighting is measured in color temperature, expressed in Kelvin. Lower temperatures (around 2700K) produce warm, yellowish light typical of standard LED bulbs, while higher temperatures (5000K and above) produce cool, bluish light similar to daylight. The same flooring sample will reflect these temperatures differently, shifting its perceived undertone.
Warm lighting tends to enhance red and yellow pigments in wood, making floors look cozier. Cool lighting emphasizes gray and blue undertones, which can make a warm-toned floor look dirty or washed out. If you have mixed lighting in a room, you will see multiple versions of the same floor throughout the day.
The 12-Inch Sample Problem: Wood Grain and Batch Variation
A small sample cannot represent a full installation because wood is a natural material with inherent variation. The 12-inch piece you hold is often selected to show the prettiest grain, not the typical range of boards you will receive Houzz flooring discussion on sample accuracy. In a full room, you might have hundreds of boards, each with slightly different color depth, grain pattern, and character marks.
Batch variation also plays a role. Flooring is manufactured in batches, and dye lots or staining processes can differ slightly between runs. The sample you took home might be from an older batch than the inventory being installed, leading to a subtle but noticeable mismatch. This applies to engineered wood, laminate, and vinyl plank alike, though the degree of variation is typically larger with real wood products.
How Wall Paint and Room Decor Shift Floor Color
Flooring does not exist in a vacuum. It reflects the colors around it, and your walls, furniture, and even ceiling paint act as a giant color filter. A floor with a warm undertone will appear more orange if your walls are painted a warm cream, but it will look grayer and more muted against a stark white wall.
This visual contrast is why a sample that looked perfect in a bright, neutral showroom can look completely wrong in a room with bold decor or dark cabinetry. The floor is not changing; your brain is comparing it to new reference points. Interior design guidance often suggests evaluating flooring samples against the actual wall color in the room where they will be installed, not against the white walls of a store McCullough's Flooring on 2026 design trends.
Metamerism: Why Two Lights Show Two Different Colors
Metamerism is the scientific term for when two colors appear to match under one light source but not under another. This occurs because the pigments in flooring reflect light across a spectrum of wavelengths, and different light sources emit different mixes of those wavelengths. Your eye and brain interpret the reflected light as a single color, but the calculation changes when the light source changes.
This is why a flooring sample can look like a perfect match for your cabinets in the showroom, only to look mismatched in your kitchen. Metamerism is particularly strong with manufactured products like laminate and vinyl, which use printed layers and wear layers that can react differently to UV and artificial light than natural wood does.
The Physics Behind the Shift
To understand metamerism, you need to understand how color is perceived. A red oak floor does not contain 'red' pigment; it contains molecules that absorb most wavelengths of light and reflect the red portion of the spectrum back to your eye. A light source, whether the sun, a halogen bulb, or an LED, emits a unique signature of wavelengths. Sunlight emits a full, balanced spectrum. A standard warm LED bulb, however, emits a narrow band of wavelengths centered around the yellow-orange range, with a distinct spike in blue.
When you look at a floor under a warm LED, the pigments that reflect yellow and orange wavelengths are strongly activated, while those that reflect blue are starved of light. The result is a floor that looks richer and more amber than it does in daylight. Under a cool, daylight-balanced LED (5000K+), the opposite happens: the blue spike in the light source activates the gray and blue undertones in the floor, making it look flatter and cooler.
Why This Matters for Your Home
Most homes have a mix of light sources: north-facing windows that cast cool, diffused daylight; south-facing windows that pour in warm, direct sun; and LED bulbs that range from 2700K to 5000K. A floor that looks perfectly neutral under your kitchen's recessed 3000K lighting can look distinctly pink or green under the 5000K daylight from a nearby sliding glass door.
A common pattern is for homeowners to test a sample under a single lamp and declare it a match. This is a mistake. You need to test the sample under every light source that will be present in the room simultaneously. If you have a pendant light over a kitchen island and a window nearby, the floor will be caught between two different light signatures, and the perceived color will be a blend of both.
The 'Light Stacking' Test
To identify metamerism in your own home, use the 'light stacking' test:
- Place the sample on the floor in the center of the room.
- Turn on every light fixture in that room, including under-cabinet lights, floor lamps, and overhead fixtures.
- Open all blinds and curtains to let in natural light.
- Observe the sample for 30 seconds. If the color appears to 'shift' or 'vibrate' as your eye moves between the different light sources, you are experiencing metamerism.
- Now, turn off all artificial lights and observe the sample under natural light only. Then, close the blinds and observe under artificial light only. Compare the two.
If the floor looks like a completely different color under these two conditions, you have a high-metamerism product. This is not a defect, it is a property of the pigments used. The question is whether you can live with the range of colors it will display throughout the day.
For natural wood floors, the effect is usually less pronounced because the color comes from the wood's natural tannins and oils, which reflect a broader spectrum of light. For laminate and vinyl, the printed layer is often created with a limited set of dyes, making the metameric shift more dramatic. If you are considering a manufactured product, the light stacking test is not optional, it is essential.
The 24-Hour Rule: How to Test Flooring Samples at Home
The most reliable method for evaluating flooring samples is to live with them for a full day. The 24-hour rule is simple: place large samples in the actual room, leave them for 24 hours, and observe them during morning, afternoon, and evening light. This single practice prevents more flooring mistakes than any other tip.
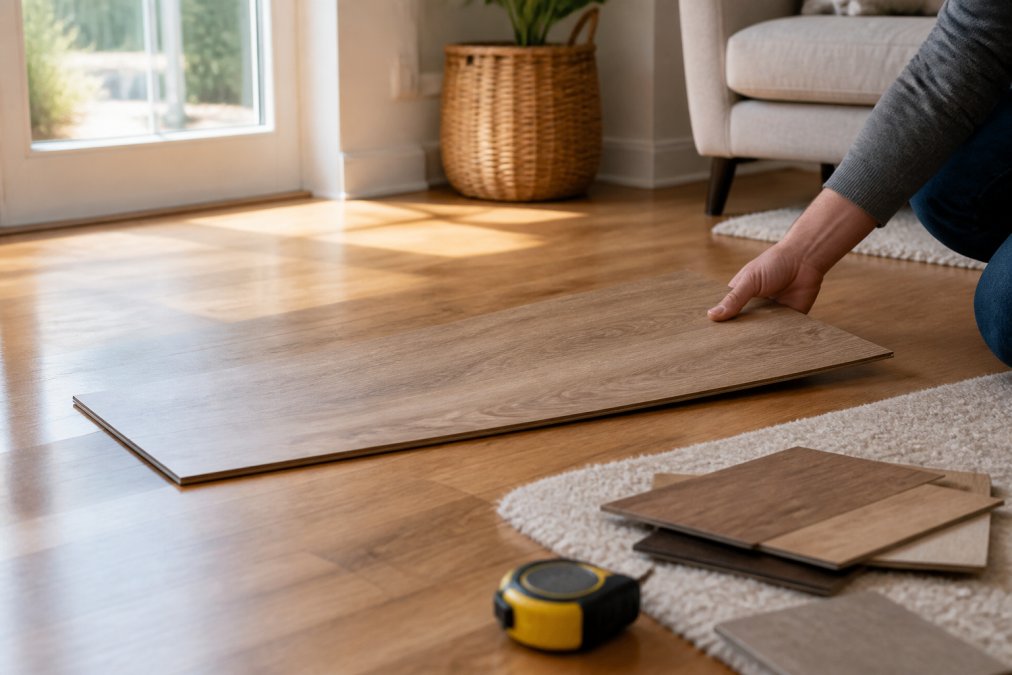
But a 24-hour test is only as good as its structure. A common pattern is for homeowners to glance at a sample in passing, which captures only a single moment of light. To get a true read, you need a deliberate protocol that isolates how the floor behaves under the specific conditions you live with.
The 3-Phase Observation Protocol
Divide your 24-hour test into three distinct observation phases, each timed to a different lighting condition:
- Morning (7:00 AM - 9:00 AM): Observe the sample under the first direct or diffused light of the day. Morning light is typically cooler and bluer, which will emphasize any gray or green undertones in the flooring. This is the moment to check if the floor looks too 'cold' for your space.
- Midday (12:00 PM - 2:00 PM): This is the brightest, most neutral light of the day. It provides the closest approximation to showroom lighting. If the sample looks good here, it confirms the base color is correct. Note how much light actually reaches the floor, this is your baseline for the room's true brightness.
- Evening (7:00 PM - 9:00 PM): Turn on all the artificial lights you would normally use in the room. This is the most critical phase. The warm glow of a 2700K bulb will amplify red and yellow pigments, while a 4000K cool LED will flatten the color. Many homeowners are surprised to find that a sample appears as an entirely different color by evening compared to its morning appearance Reddit r/Flooring discussion on home sample testing.
During each phase, do not just look at the sample on the floor. Pick it up and hold it vertically against your baseboards and cabinetry. This mimics the installed perspective and reveals how the floor's edge grain interacts with your trim color.
Sample Placement Techniques That Work
Where you place the sample matters as much as how long you leave it. Avoid testing samples in a single spot near a window, as that area receives the most direct light and will not represent the whole room.
- The Contrast Test: Place one sample in the brightest spot in the room (directly in a sunbeam) and another in the darkest corner (behind a door or under a shadow). This extreme contrast test reveals the floor's full color range. If the color shift between these two points is so drastic that you dislike one of the versions, that floor is a poor fit for the room.
- The Vertical Lean: Lean the sample vertically against the wall where the floor meets the baseboard. This is how you will actually see the floor when standing, and it prevents the 'top-down' distortion that makes floors look darker and less textured than they are.
- The Furniture Check: Place the sample next to your largest fixed elements, kitchen islands, fireplace surrounds, or built-in cabinetry. Hold it against these surfaces, not just on the floor, to check for metameric mismatches that only appear when two materials are in direct contact.
- The Rotation Rule: Move the sample at least three times during the 24-hour period. A spot that is bright at noon may be in deep shadow by 4:00 PM. By rotating the sample, you capture the light angles that change as the sun moves across the room.
The goal is not to find a floor that looks good in every light, but to find one that looks good in the light you actually live with most. If the floor passes the 3-phase observation protocol and the contrast test, you have done the due diligence necessary to make a confident purchase.
How to Choose Flooring Color That Works in Every Room
Choosing a flooring color that works across multiple rooms requires planning for the light transitions between spaces. An open floor plan means the floor will be viewed under different lighting conditions simultaneously, so a color that works in a sun-drenched kitchen may look dull in an adjacent hallway.
A practical approach to how to choose flooring color starts with identifying your room's dominant light source. Rooms with large windows facing south or west receive warm, intense light for much of the day. Rooms facing north receive cooler, more diffused light. Select a floor with neutral undertones if you have mixed lighting, as these tend to adapt more gracefully than strongly warm or cool tones.
Finding the Best Flooring for Living Room Light Conditions
The best flooring for living room installations balances your aesthetic preferences with the practical realities of how that room is used and lit. Living rooms often combine natural light from windows with multiple lamps and overhead fixtures, creating a complex lighting environment that will show off different aspects of the floor throughout the day.
For living rooms with abundant natural light, consider floors with a matte or low-sheen finish. High-gloss finishes can create glare and make color variations more pronounced in direct sunlight. In darker living rooms, lighter floors with a subtle texture help reflect ambient light and make the space feel larger, while darker floors can make a cozy room feel even more intimate.
Conclusion: Trust Your Eyes, Not Just the Sample
The mismatch between a flooring sample and the final installation is a universal experience, not a sign that you chose wrong. Understanding why flooring samples look different at home helps you evaluate them effectively rather than relying on showroom impressions. The 24-hour test, combined with attention to lighting and placement, gives you the confidence to make a decision you will live with for years.
We serve all of Suffolk County with a full range of flooring options and expert guidance. Our team helps homeowners evaluate samples in real-world conditions and provides meticulous installation services for everything from historic homes to coastal properties. Visit our showroom to see how we can help you find the floor that looks right in your space, not just in our store.
Frequently Asked Questions
Why does flooring color change depending on the time of day?
Natural light changes color temperature as the sun moves across the sky. Morning light has a different cast than afternoon or evening light. A floor with warm undertones can look rich and golden at midday but appear flat or gray by dusk. Artificial lighting adds another variable. To avoid surprises, look at your flooring samples at multiple times of day, not just once. This is why the 24-hour rule exists: it gives you a full cycle of light conditions.
Should I look at flooring samples in every room?
Yes, if the rooms have different light sources or orientations. A north-facing room gets cool, even light all day, which can mute warm tones. A west-facing room gets strong afternoon sun that can amplify yellow or orange undertones. Wall color, ceiling height, and the type of light bulbs you use also change perception. Carry your samples from room to room and observe them under each room's specific conditions before making a final decision.
Does wall color influence how flooring looks in a room?
Wall color has a major effect on how flooring samples appear at home. Light reflects off walls and onto the floor, so a warm beige wall can add a subtle golden cast, while a cool gray wall can make the same floor look bluer or more muted. White walls are not neutral either; they can make floors look darker by contrast. Hold your sample vertically against the wall and also lay it flat on the floor to see both effects.
What is the best way to test flooring samples at home?
Request full-size planks, not just small chips, from your flooring retailer. Lay them flat in the room where you plan to install them, placing several boards side by side to simulate a real floor. Leave them for at least 24 hours so you can see them in morning, midday, and evening light. Move them to different spots in the room and near windows. Take photos without flash and compare them to the showroom sample before you order.
Getting the color right comes down to testing, patience, and honest assessment of your home's lighting. Hamptons carpet one floor and Home offers professional flooring installation and a wide selection of materials suited to the unique demands of Suffolk County living. Get started with us and bring your samples home for the 24-hour test before you commit.