 Ultimate guide
Why Subfloor Leveling Is Essential for Flooring Longevity
Table of Contents
- Why Subfloor Leveling Is Essential for Longevity and Floor Performance
- Common Signs of an Uneven Subfloor You Should Not Ignore
- How to Check Subfloor Level Before Any Flooring Installation
- Best Tools for Subfloor Leveling: From Self-Leveling Compound to Screed
- Subfloor Material Specifics: Concrete, Plywood, and OSB Compared
- DIY vs. Professional Leveling: A Cost-Benefit Analysis
- Why Subfloor Leveling Is Essential for Longevity Across All Floor Types
- Conclusion
Last Updated: June 7, 2026
Flooring failures rarely announce themselves in advance. A tile that cracks six months after installation, hardwood that buckles at the seams, or LVP that separates at the joints: these problems almost always trace back to a surface that was never properly prepared. Understanding why subfloor leveling is essential for longevity is the single most important concept any homeowner or contractor can grasp before a floor covering goes down. At Hamptons carpet one floor and Home, we work with Suffolk County homeowners every week who come to us after a flooring failure that could have been prevented at the subfloor stage.
Here's what most guides get wrong: they treat subfloor leveling as a cosmetic step. It isn't. It's a structural one. An uneven substrate creates uneven load distribution, which accelerates wear, compromises adhesive bonds, and causes grout deterioration within the first year of use.
Why Subfloor Leveling Is Essential for Longevity and Floor Performance
A floor covering installed over an uneven base experiences concentrated stress at the high points, stress that no underlayment or adhesive system can fully compensate for. Over time, those concentrations cause premature wear, floor deflection, and, in rigid flooring systems, outright cracking.
The standard tolerance most manufacturers specify is 3/16 of an inch over a 10-foot span, or 1/8 of an inch over a 6-foot span. According to the National Wood Flooring Association's installation guidelines, exceeding these tolerances before hardwood installation is one of the leading causes of warranty voidance.
How an Uneven Subfloor Causes Installation Failure
When a floor covering spans a high spot, every footstep concentrates force at that bridge point. For LVP, the locking joints flex repeatedly until they fail. For tile, the hollow spot causes flex under load, cracking the tile body or grout line. For hardwood, repeated flex causes face-checking and finish crazing.
Adhesive systems suffer a related failure mode. Without a flat plane, adhesive contacts only the high points, reducing bond area and creating zones where the floor can lift or shift laterally.
The Real Cost of Skipping Subfloor Preparation
Skipping leveling saves a few hours and the cost of materials. A full tear-out and reinstall of a mid-grade LVP floor in a 400-square-foot room typically runs into thousands of dollars when you factor in labor, disposal, and new materials. Proper subfloor preparation is a one-time cost measured in bags of patching compound and a few hours of work, the most cost-effective investment in flooring longevity available.
Common Signs of an Uneven Subfloor You Should Not Ignore
Walking your floor before installation tells you more than any inspection tool. A subfloor that flexes underfoot, produces a hollow sound when tapped, or shows visible humps and dips is communicating a problem that will not resolve itself once the finish floor goes down.

Visible and Structural Warning Signs
The signs of an uneven subfloor fall into two categories: things you can see and things you can feel.
Visible warning signs:
- Floor crowning or cupping along plank edges
- Gaps that open and close seasonally at plank joints
- Cracked grout lines, particularly in diagonal patterns
- Tiles that rock or click when stepped on
- Visible humps or depressions in the floor surface
- Buckled or lifted flooring near walls or transitions
Structural warning signs:
- Soft spots that compress underfoot
- Squeaking that localizes to specific areas (often indicates loose subfloor panels over floor joists)
- Doors that stick or drag after flooring installation
- Visible separation between the subfloor and floor joists when viewed from below
A common mistake is attributing these signs to the finish flooring itself rather than the substrate. The finish floor is almost always the victim, not the cause.
How to Check Subfloor Level Before Any Flooring Installation
Checking subfloor level takes less than an hour for most rooms and immediately identifies problems before they become expensive.
Step-by-Step Floor Flatness Inspection Process
What you'll need:
- A 6-foot or 10-foot straightedge (a long level works well)
- A tape measure
- Painter's tape or chalk
- A pencil
Total time: 30-45 minutes for a standard room
-
Clear the subfloor completely. Remove all debris, fasteners, and old adhesive residue.
-
Lay the straightedge across the floor in multiple directions. Work in a grid pattern: parallel to the longest wall, then perpendicular, then diagonally.
-
Measure the gap beneath the straightedge. Any point where you can slide a coin beneath the straightedge is a low spot. Mark the perimeter with painter's tape.
-
Identify high spots. A straightedge that rocks indicates a high point at the center of the rock. Mark these with chalk.
-
Measure deviation. Anything exceeding 3/16 inch over 10 feet requires correction before installation.
-
Check for flex. Walk the entire subfloor, pressing down firmly. Any area that moves more than 1/16 inch under load indicates insufficient joist support and may require mechanical fastening before leveling.
Expected result: a clear map of every high and low spot in the room, with measurements that tell you exactly how much leveling compound you'll need.
Best Tools for Subfloor Leveling: From Self-Leveling Compound to Screed
The right tool depends on the substrate type, the severity of variation, and the finish floor being installed.
Core leveling tools and materials:
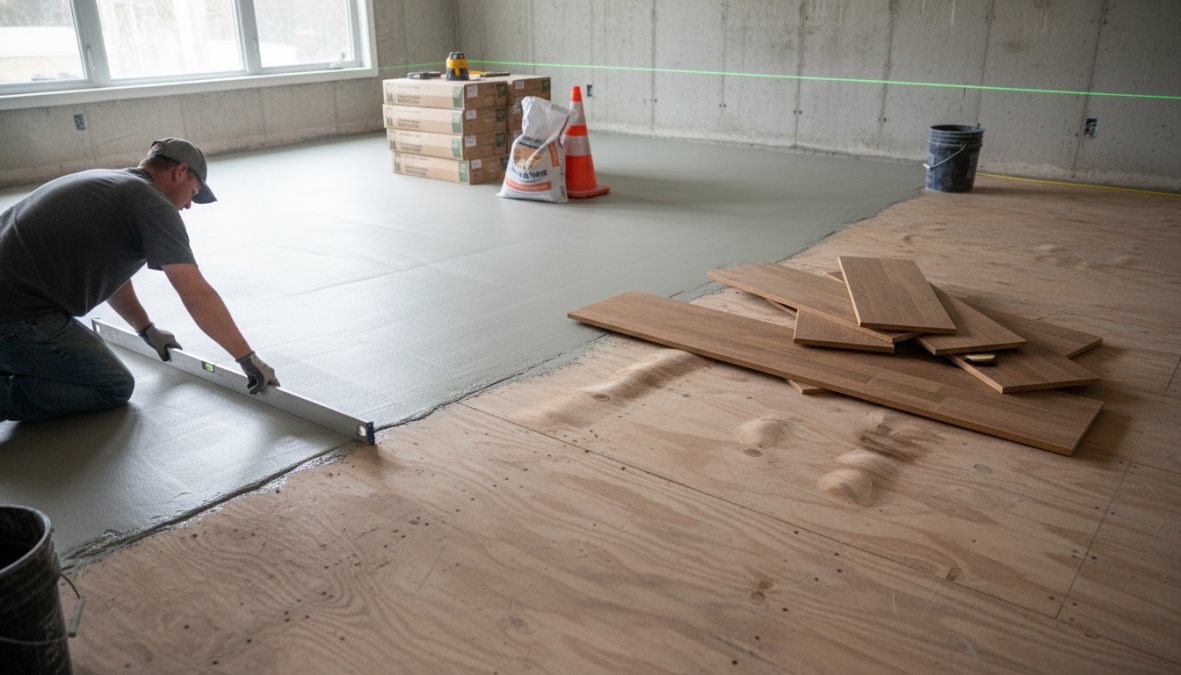
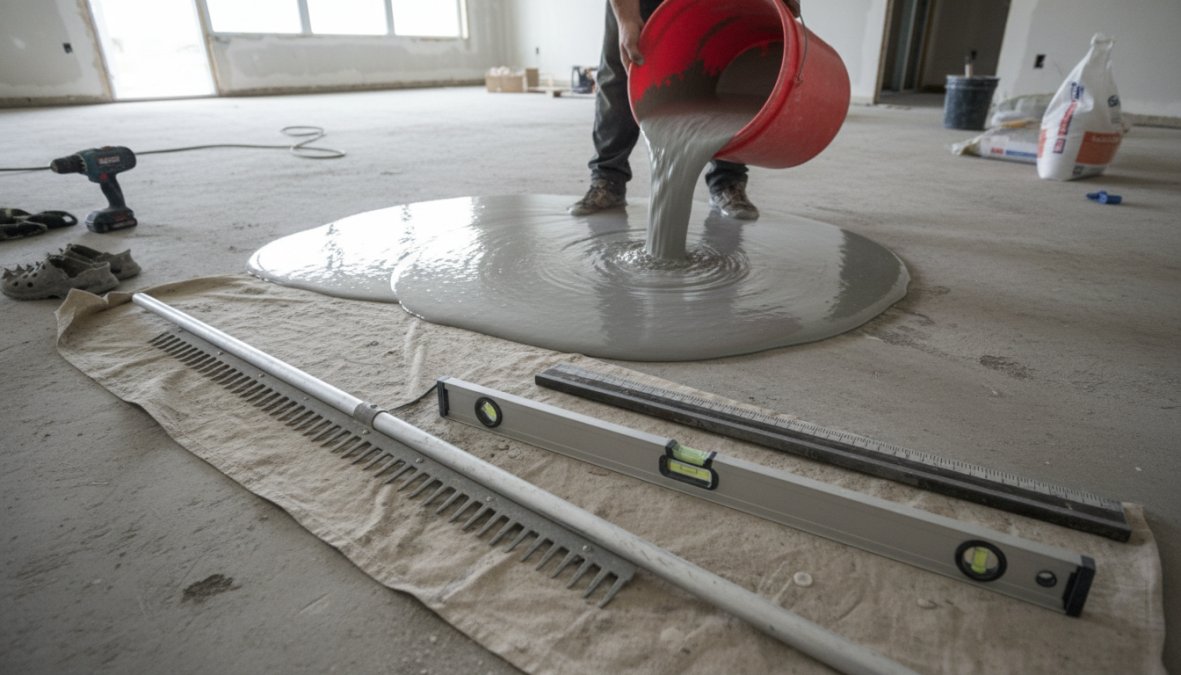
- Self-leveling compound: The workhorse for filling low spots on concrete or plywood. Poured as a liquid, it seeks its own level and cures to a hard, smooth surface. Best for depressions up to 1 inch deep (check manufacturer specs).
- Patching compound: Trowel-applied for smaller voids, cracks, and surface defects. Sets faster than self-leveling compound and is better suited for spot repairs.
- Floor screed: A semi-dry mortar mix for leveling large areas over concrete, particularly in commercial applications.
- Long-handled gauge rake: Spreads self-leveling compound evenly and breaks up air bubbles before the material sets.
- Spiked roller: Removes air bubbles from poured self-leveling compound for a smooth, void-free surface.
- Subfloor screws and a screw gun: For mechanically fastening plywood or OSB panels that flex between joists before leveling compound is applied.
- Moisture barrier or primer: Applied before self-leveling compound on concrete to prevent bond failure from moisture migration.
Subfloor Material Specifics: Concrete, Plywood, and OSB Compared
The subfloor material determines every subsequent decision: which leveling product to use, what moisture testing to perform, and which finish floors are compatible.
| Subfloor Type | Common Issues | Leveling Method | Moisture Risk |
|---|---|---|---|
| Concrete | Cracks, heaving, high spots | Self-leveling compound or screed | High - test before leveling |
| Plywood | Deflection, swelling, fastener pops | Sand high spots, patching compound for lows | Moderate |
| OSB | Edge swelling, delamination | Patching compound, mechanical fastening | High - OSB degrades faster |
Concrete Substrate: Moisture Barriers and Leveling Compounds
Concrete is the most forgiving substrate for leveling because it doesn't flex under load. The primary challenge is moisture: concrete wicks moisture from the ground below, attacking adhesives, causing hardwood to swell, and promoting mold beneath impermeable floor coverings.
Before any leveling work on concrete, perform a calcium chloride test or an in-situ relative humidity probe test, following ASTM International's flooring moisture testing standards. If moisture levels exceed the threshold specified by your finish floor manufacturer, install a moisture barrier before applying leveling compound. High spots on concrete are addressed by grinding, not by adding material.
Plywood and OSB Subfloors: Sanding, Patching, and Deflection
Plywood and OSB flex, making floor deflection between joists the primary enemy of tile and stone installations. The combined thickness of subfloor and underlayment should meet minimum stiffness requirements: typically L/360 for ceramic tile and L/720 for large-format tile.
High spots on plywood are addressed with a belt sander or floor sander. Low spots and fastener pops are filled with patching compound. Any panel that moves more than 1/16 inch under load should be secured with additional screws before leveling compound is applied. OSB requires particular attention at the edges, where moisture-related swelling is most common.
DIY vs. Professional Leveling: A Cost-Benefit Analysis
For minor corrections on plywood, DIY leveling is often appropriate. For concrete with significant variation or any floor where moisture is a factor, professional involvement changes the risk profile substantially.
DIY leveling makes sense when:
- The variation is under 1/4 inch and localized to a few spots
- The substrate is plywood or OSB in good structural condition
- You have experience mixing and pouring self-leveling compound
- Moisture testing shows acceptable levels
Professional leveling is the better choice when:
- Variation exceeds 1/2 inch over any 10-foot span
- The concrete substrate shows active cracking or heaving
- Moisture levels are elevated and a remediation strategy is needed
- The finish floor is large-format tile, stone, or engineered hardwood with tight tolerance requirements
- The project involves floor joists that need structural reinforcement
The real cost of a DIY leveling failure isn't the materials: it's the labor to tear out the finish floor, redo the leveling, and reinstall. Professional leveling typically includes a warranty on the work, shifting that risk off the homeowner.
Why Subfloor Leveling Is Essential for Longevity Across All Floor Types
The relationship between subfloor flatness and floor performance is not uniform across all flooring types. Different materials respond to substrate variation in different ways, and understanding those differences helps you set the right tolerance targets before installation begins.
LVP, Hardwood, and Tile: How Each Reacts to an Uneven Base
LVP (Luxury Vinyl Plank): LVP is a floating floor system, making it more tolerant of minor variation than glue-down products, but its locking joint system is the vulnerability. Repeated flex at high spots causes joint separation and permanent damage to the locking profile. Most LVP manufacturers specify a maximum variation of 3/16 inch over 10 feet, and exceeding that tolerance voids the product warranty.
Hardwood: Both solid and engineered hardwood are sensitive to subfloor variation because they're fastened or glued directly to the substrate. A high spot creates a fulcrum: every footstep rocks the plank across that point, stressing the fasteners and eventually causing face-checking or squeaking.
Ceramic and Porcelain Tile: Tile is the least tolerant of substrate movement. The rigid bond means any flex translates directly into stress on the tile body or grout joint. Large-format tiles (anything over 15 inches) amplify this problem because they span greater distances and are more sensitive to variation beneath them.
Environmental Factors: Humidity, Climate, and Foundation Shifts
Subfloor leveling isn't a one-time event for wood-framed structures. Foundation shifts, seasonal humidity changes, and temperature cycling all affect subfloor flatness over time, particularly relevant in Suffolk County, where coastal humidity levels and seasonal temperature swings are pronounced.
According to the Wood Moisture Council's guidance on wood subfloor acclimation, wood subfloors should reach equilibrium moisture content with the installation environment before any finish floor is installed. For concrete slabs on grade, homeowners should re-check subfloor flatness before any flooring replacement project, as a slab that was perfectly flat at installation may develop crowning or low spots as the soil beneath it settles.
For comprehensive guidance on moisture management, the Resilient Floor Covering Institute's installation guidelines provide detailed protocols for both concrete and wood substrates.
Uneven subfloors are the most preventable cause of flooring failure, and the most commonly skipped step in residential installations. The team at Hamptons carpet one floor and Home has guided homeowners across Suffolk County through proper subfloor preparation before every installation, because we've seen firsthand what happens when it's skipped. If you're planning a new floor installation or dealing with a floor already showing signs of failure, visit us at Hamptons carpet one floor and Home to get a professional assessment and find the right floor covering solution for your home.
Frequently Asked Questions
What happens if you don't level your subfloor before installing flooring?
Skipping subfloor leveling is one of the most common causes of premature flooring failure. An uneven base creates pressure points that crack tile grout, cause floor buckling in hardwood and LVP, and break adhesive bonds in glue-down installations. Over time, the flooring wears unevenly, voids your manufacturer warranty, and can create tripping hazards. Proper subfloor preparation before any installation is the single most effective way to protect your investment and ensure flooring longevity.
How do I know if my subfloor needs leveling?
Common signs of an uneven subfloor include squeaking or bouncing underfoot, visible dips and humps across the floor surface, doors that stick or swing open on their own, and gaps forming between floorboards or along baseboards. You can also check subfloor level using a long straightedge or 6-foot level, any gap greater than 3/16 of an inch over 10 feet typically indicates the subfloor needs patching or leveling before new flooring is installed.
Can I install LVP or laminate flooring on an uneven subfloor?
Installing LVP or laminate on an uneven subfloor is strongly discouraged. These floating floor systems rely on a flat, stable base to lock together properly. Even minor floor deflection can cause the click-lock joints to stress and separate over time, leading to gaps, edge curling, and installation failure. Most LVP manufacturers specify a floor flatness tolerance of 3/16 inch per 10 feet. Exceeding that threshold without leveling first will likely void the product warranty.
What is the best method for leveling a concrete subfloor?
For a concrete substrate, the most reliable approach is applying a self-leveling compound after thorough surface preparation. First, check for subfloor moisture using a moisture meter and install a moisture barrier if readings are elevated. Grind down high spots, fill cracks with a patching compound, then pour and spread the self-leveling compound using a gauge rake. Allow full cure time per the manufacturer's instructions before laying underlayment or flooring. For large depressions, a screed layer may be needed first.
Does professional subfloor leveling increase home value?
While subfloor leveling itself is not a visible upgrade, it directly protects the value of your finished flooring investment. Properly leveled subfloors extend flooring lifespan, prevent costly repairs, and maintain the aesthetic appeal that buyers notice during home sales. In Suffolk County, NY and the Hamptons area, where high-end flooring is common, a floor that shows buckling, cracked grout, or uneven wear can significantly reduce perceived home value and become a negotiating point in real estate transactions.
How do humidity and climate affect subfloor leveling in Long Island homes?
Humidity and seasonal temperature swings are especially relevant for homes in Suffolk County, NY. Wood subfloors, both plywood and OSB, expand and contract with moisture changes, which can undo leveling work if subfloor moisture is not addressed first. Always test subfloor moisture levels before leveling, use a moisture barrier where needed, and allow materials to acclimate. Foundation shifts from freeze-thaw cycles can also reintroduce unevenness over time, making periodic floor flatness checks part of sound long-term maintenance.
This article was written using GrandRanker